Lesson 15: 2D Lighting
You will turn flat, evenly lit scenes into moody ones: lamps that pool warm light, a flashlight that sweeps a dark room, and brick walls whose edges catch a moving torch. Lighting is one of the cheapest ways to give a 2D game atmosphere, and it starts with two blend modes you already have.
🎯 Learning Objectives
By the end of this lesson, you will be able to:
- Build a lightmap by adding ambient, point and spot lights, then multiply it onto a scene with pygame-ce blend modes.
- Precompute light shapes once with numpy and reuse them every frame, including a rotated flashlight cone.
- Explain what a normal map stores and compute one from a height map with numpy.
- Light a normal-mapped surface on the GPU with Lambert's law, uploading lights as uniform arrays.
- Convert positions between pygame's y-down pixels and a shader's y-up coordinates.
Project: a Torchlit Wall: a brick wall lit by a mouse-driven torch and two colored lamps, with the normal map switchable on and off.
In This Lesson
💡 How Light Works in a 2D Game
Think of a theater. The set is painted in full color, but what the audience sees depends on the lights: a dim wash over the whole stage so nothing is pitch black, a warm spotlight on the hero, a cold blue lamp in the corner. Game lighting works the same way. Your sprites and tiles are the painted set (their colors are called albedo), and lighting decides how much of that color reaches the player's eye at each pixel.
Three ideas carry this whole lesson:
- Lights add up. Two lamps on one wall make it brighter than either lamp alone. Ambient light (the dim wash) is simply one more light that reaches everywhere.
- Light fades with distance. A falloff function makes each light strongest at its center and weaker farther away.
- Final color = albedo × light. A red brick under white light stays red; under blue light it turns dark, because it has little blue to reflect.
🗺️ The Lightmap: Add Lights, Multiply the Scene
The classic 2D technique needs no GPU at all. You build a lightmap: a Surface the size of the screen that holds how much light reaches every pixel. Black means darkness, white means full light. Each frame:
- Fill the lightmap with the ambient color.
- Add every light onto it with
special_flags=pygame.BLEND_RGB_ADD. Black parts of a light image add nothing, so no colorkey is needed. - Draw the scene normally, then multiply the lightmap onto it with
special_flags=pygame.BLEND_RGB_MULT.
def build_lightmap(lightmap, on, player, aim_deg, splats, cone):
    """Everything is ADDED onto the lightmap. Black adds nothing, so no colorkey is needed."""
    lightmap.fill(AMBIENT if on[1] else (0, 0, 0))
    if on[2]:
        lightmap.fill(SUN, special_flags=pygame.BLEND_RGB_ADD)
    for i, ((x, y), radius, _), splat in zip((3, 4), LAMPS, splats):
        if on[i]:
            lightmap.blit(splat, (x - radius, y - radius), special_flags=pygame.BLEND_RGB_ADD)
    if on[5]:
        beam = pygame.transform.rotate(cone, aim_deg)     # rotate() turns counterclockwise
        lightmap.blit(beam, beam.get_rect(center=player), special_flags=pygame.BLEND_RGB_ADD)


# every frame:
build_lightmap(lightmap, on, player, aim_deg, splats, cone)
screen.blit(ground, (0, 0))
screen.blit(lightmap, (0, 0), special_flags=pygame.BLEND_RGB_MULT) # scene x light- Add clamps each channel at 255, so overlapping lights saturate toward white instead of wrapping around.
- Multiply computes
scene × light ÷ 255per channel. A lightmap value of 255 leaves the scene's color unchanged; 0 turns it black. Because the lightmap tops out at 255, this method can darken and tint but never make anything brighter than its albedo. The GPU version later in this lesson doesn't have that limit. - You may see
BLEND_ADDandBLEND_MULTin older code. In pygame-ce they are the same constants asBLEND_RGB_ADDandBLEND_RGB_MULT; this course uses the RGB names because they say what they do. - Keep the lightmap Surface and reuse it. Creating a new screen-sized Surface every frame is wasted work.
🔦 Precomputed Light Shapes
Where do the light images (splats and cone) come from? Computing a falloff for every pixel in a Python loop, every frame, would take far too long. Instead you compute each shape once at startup with numpy, and every frame just blits it.
def attenuation(d):
    """Light fades with distance d (pixels). 1 at the center, then a quadratic falloff."""
    return 1.0 / (1.0 + 0.005 * d + 0.00006 * d * d)


def make_splat(radius, color):
    """A round light: a black Surface with a colored glow that fades to 0 at `radius`."""
    xs = np.arange(radius * 2) - radius + 0.5
    d = np.sqrt(xs[:, None] ** 2 + xs[None, :] ** 2)                 # (w, h) distances
    edge = attenuation(radius)
    a = np.clip((attenuation(d) - edge) / (1.0 - edge), 0.0, 1.0)    # exactly 0 at the rim
    rgb = np.clip(a[..., None] * np.array(color, dtype=np.float32), 0, 255)
    return pygame.surfarray.make_surface(rgb.astype(np.uint8))
1 / (1 + a·d + b·d²)is the usual falloff for point lights: close to 1 near the light, fading smoothly. Tuneaandbfor how far your lights reach in pixels.- Subtracting the falloff's value at the rim and rescaling makes the splat reach exactly 0 at its edge, so you never see a hard circle where the image ends.
- The color is clipped to 0..255 before converting to
uint8, so a bright value can never wrap around to a dark one.
A flashlight is the same idea with a direction. The lab's make_cone() computes a beam pointing right once, with a soft edge from smoothstep on the angle. Each frame, pygame.transform.rotate(cone, aim_deg) turns it toward the mouse. rotate() turns counterclockwise, while screen y points down, so the angle is -math.degrees(math.atan2(dy, dx)). Rotation makes the Surface bigger to fit the corners; blitting it centered on the player with beam.get_rect(center=player) keeps the beam's origin in place.
📄 Full program: lightmap.py (the warm-up lab)
Move with WASD or the arrow keys, aim the flashlight with the mouse, and toggle the five lights with 1 to 5. The window's HUD shows which lights are on; closing it prints the average time the lighting took per frame.
"""Lightmap: Advanced Lesson 15 warm-up lab (solution).

Classic 2D lighting with plain pygame-ce: build a "lightmap" Surface each
frame (ambient + sun + point-light splats + a flashlight cone, all ADDED
together), then MULTIPLY it onto the scene.
    WASD / arrows  move      mouse  aim the flashlight
    1 ambient  2 sun  3 warm lamp  4 cool lamp  5 flashlight    Esc quit
The splats and the cone are computed once with numpy; each frame only blits.
"""
import math
import time

import numpy as np
import pygame


SIZE = W, H = 960, 540
AMBIENT = (18, 20, 34)          # dim blue night
SUN = (40, 34, 24)              # a faint warm fill everywhere
LAMPS = [((250, 200), 220, (255, 150, 70)), ((690, 330), 220, (70, 150, 255))]
CONE_RADIUS = 300
CONE_HALF_ANGLE = 22            # degrees either side of the beam
SPEED = 220                     # pixels per second


def attenuation(d):
    """Light fades with distance d (pixels). 1 at the center, then a quadratic falloff."""
    return 1.0 / (1.0 + 0.005 * d + 0.00006 * d * d)


def make_splat(radius, color):
    """A round light: a black Surface with a colored glow that fades to 0 at `radius`."""
    xs = np.arange(radius * 2) - radius + 0.5
    d = np.sqrt(xs[:, None] ** 2 + xs[None, :] ** 2)                 # (w, h) distances
    edge = attenuation(radius)
    a = np.clip((attenuation(d) - edge) / (1.0 - edge), 0.0, 1.0)    # exactly 0 at the rim
    rgb = np.clip(a[..., None] * np.array(color, dtype=np.float32), 0, 255)
    return pygame.surfarray.make_surface(rgb.astype(np.uint8))


def make_cone(radius, half_angle_deg, color=(255, 245, 225)):
    """A flashlight beam pointing RIGHT (+x); rotate the Surface to aim it."""
    xs = np.arange(radius * 2) - radius + 0.5
    dx, dy = xs[:, None], xs[None, :]
    d = np.sqrt(dx * dx + dy * dy)
    cos_theta = dx / np.maximum(d, 1e-6)                  # cosine of the angle to the +x axis
    inner = math.cos(math.radians(half_angle_deg * 0.6))
    outer = math.cos(math.radians(half_angle_deg))
    t = np.clip((cos_theta - outer) / (inner - outer), 0.0, 1.0)
    soft_edge = t * t * (3 - 2 * t)                       # smoothstep across the beam's edge
    edge = attenuation(radius)
    a = np.clip((attenuation(d) - edge) / (1.0 - edge), 0.0, 1.0) * soft_edge
    rgb = np.clip(a[..., None] * np.array(color, dtype=np.float32), 0, 255)
    return pygame.surfarray.make_surface(rgb.astype(np.uint8))


def make_ground():
    ground = pygame.Surface(SIZE)
    for ty in range(0, H, 40):
        for tx in range(0, W, 40):
            c = 150 if (tx // 40 + ty // 40) % 2 == 0 else 115
            pygame.draw.rect(ground, (c, c, c), (tx, ty, 40, 40))
    for x, y, w, h in [(120, 330, 90, 90), (430, 120, 140, 60), (780, 90, 60, 160)]:
        pygame.draw.rect(ground, (190, 120, 90), (x, y, w, h))           # some crates
    return ground


def build_lightmap(lightmap, on, player, aim_deg, splats, cone):
    """Everything is ADDED onto the lightmap. Black adds nothing, so no colorkey is needed."""
    lightmap.fill(AMBIENT if on[1] else (0, 0, 0))
    if on[2]:
        lightmap.fill(SUN, special_flags=pygame.BLEND_RGB_ADD)
    for i, ((x, y), radius, _), splat in zip((3, 4), LAMPS, splats):
        if on[i]:
            lightmap.blit(splat, (x - radius, y - radius), special_flags=pygame.BLEND_RGB_ADD)
    if on[5]:
        beam = pygame.transform.rotate(cone, aim_deg)     # rotate() turns counterclockwise
        lightmap.blit(beam, beam.get_rect(center=player), special_flags=pygame.BLEND_RGB_ADD)


def main():
    pygame.init()
    screen = pygame.display.set_mode(SIZE)
    pygame.display.set_caption("Lightmap")
    clock = pygame.time.Clock()
    font = pygame.font.Font(None, 24)

    ground = make_ground()
    splats = [make_splat(radius, color) for _, radius, color in LAMPS]
    cone = make_cone(CONE_RADIUS, CONE_HALF_ANGLE)
    lightmap = pygame.Surface(SIZE)
    on = {1: True, 2: True, 3: True, 4: True, 5: True}
    player = pygame.Vector2(480, 270)
    mouse = pygame.Vector2(700, 270)
    held = set()
    keys_to_dir = {pygame.K_a: (-1, 0), pygame.K_LEFT: (-1, 0), pygame.K_d: (1, 0),
                   pygame.K_RIGHT: (1, 0), pygame.K_w: (0, -1), pygame.K_UP: (0, -1),
                   pygame.K_s: (0, 1), pygame.K_DOWN: (0, 1)}
    number_keys = {pygame.K_1: 1, pygame.K_2: 2, pygame.K_3: 3, pygame.K_4: 4, pygame.K_5: 5}
    build_ms = 0.0
    frames = 0

    running = True
    while running:
        dt = clock.tick(60) / 1000
        for event in pygame.event.get():
            if event.type == pygame.QUIT:
                running = False
            elif event.type == pygame.KEYDOWN:
                if event.key == pygame.K_ESCAPE:
                    running = False
                elif event.key in number_keys:
                    n = number_keys[event.key]
                    on[n] = not on[n]
                elif event.key in keys_to_dir:
                    held.add(event.key)
            elif event.type == pygame.KEYUP:
                held.discard(event.key)
            elif event.type == pygame.MOUSEMOTION:
                mouse.update(event.pos)

        move = pygame.Vector2()
        for key in held:
            move += keys_to_dir[key]
        if move.length_squared() > 0:
            player += move.normalize() * SPEED * dt
        player.x = max(0, min(W, player.x))
        player.y = max(0, min(H, player.y))

        aim = mouse - player
        aim_deg = -math.degrees(math.atan2(aim.y, aim.x)) if aim.length_squared() > 0 else 0.0

        start = time.perf_counter()
        build_lightmap(lightmap, on, player, aim_deg, splats, cone)
        screen.blit(ground, (0, 0))
        screen.blit(lightmap, (0, 0), special_flags=pygame.BLEND_RGB_MULT)   # scene x light
        build_ms += (time.perf_counter() - start) * 1000
        frames += 1

        pygame.draw.circle(screen, (240, 240, 240), player, 9)
        names = ["ambient", "sun", "warm lamp", "cool lamp", "flashlight"]
        hud = "  ".join(f"{n}:{name} {'on' if on[n] else 'off'}" for n, name in enumerate(names, 1))
        screen.blit(font.render(hud, True, (235, 235, 245)), (10, 10))
        pygame.display.flip()

    print(f"Frames drawn: {frames}")
    if frames:
        print(f"Average lighting time: {build_ms / frames:.2f} ms per frame")
    pygame.quit()


if __name__ == "__main__":
    main()
📏 Measured, not guessed
On the machine used to write this lesson (an Intel Core i7-12700K under WSL2), building the lightmap and multiplying it onto a 960 × 540 scene took about 2.2 ms per frame with all five lights on. The program prints its own average when you close it, so check yours.
🧱 Normal Maps: Bumps Without Geometry
A lightmap lights every pixel of a sprite equally, so a brick wall still looks like flat wallpaper. Real bricks are lit on the edges that face the lamp and shadowed on the edges that face away. To light that way, each pixel needs to know which way its surface faces. That direction is the pixel's normal: an arrow of length 1 pointing out of the surface.
A normal map is an image that stores one normal per pixel, packed into its colors: red holds x, green holds y and blue holds z, each squeezed from −1..1 into 0..255. A pixel facing straight out of the screen, (0, 0, 1), is stored as (128, 128, 255), which is why normal maps look mostly light blue. The shader unpacks it with rgb * 2.0 - 1.0.
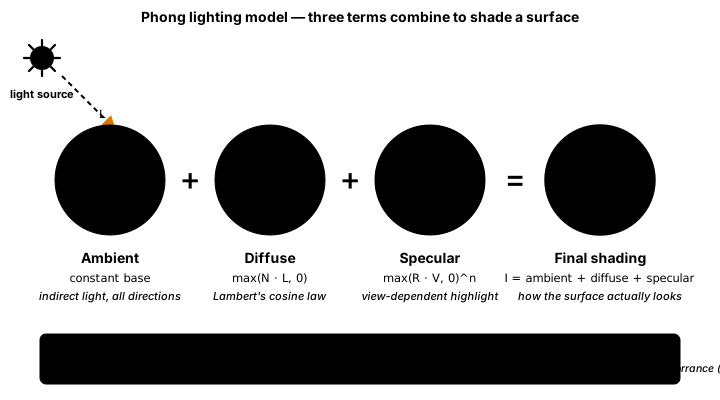
Lambert's law turns a normal into brightness: a surface is lit in proportion to the cosine of the angle between its normal N and the direction to the light L. For unit vectors that cosine is the dot product, so diffuse = max(dot(N, L), 0.0). Facing the light gives 1, edge-on gives 0, and facing away is clamped to 0 instead of going negative.
Artists paint or bake normal maps, but you can also compute one from a height map (1 on top of a brick, 0 in the mortar). Where height rises to the right, the surface tilts to face left; where it rises downward, it faces up. numpy's np.gradient gives those slopes for every pixel at once:
def normal_map_from_height(height, strength=6.0, blur=4):
    """Turn a (w, h) height array (y DOWN, like pygame) into (w, h, 3) uint8 normal colors.

    The normals use y UP, matching the texture after pygame.image.tobytes(..., True).
    """
    k = 2 * blur + 1                                     # soften the steps into bevels
    for axis in (0, 1):
        padded = np.pad(height, [(blur, blur) if a == axis else (0, 0) for a in (0, 1)], mode="edge")
        height = sum(np.take(padded, range(i, i + height.shape[axis]), axis=axis)
                     for i in range(k)) / k
    dh_dx = np.gradient(height, axis=0)                  # slope going right
    dh_dy = np.gradient(height, axis=1)                  # slope going DOWN the screen
    n = np.stack([-dh_dx * strength, dh_dy * strength, np.ones_like(height)], axis=-1)
    n /= np.linalg.norm(n, axis=-1, keepdims=True)       # unit length
return np.clip((n * 0.5 + 0.5) * 255.0 + 0.5, 0, 255).astype(np.uint8)- The height map is blurred first (a box blur along each axis, with clamped edges) so each brick's edge becomes a gentle bevel instead of a one-pixel cliff.
- The x part is
-dh_dx: height rising to the right means the surface faces left. - The y part is
+dh_dy, and that sign is worth a second look.dh_dyis measured going down the screen, but the shader works with y pointing up. Rising downward means facing up, so the flip cancels the minus sign. Getting it backwards is the most common normal-map bug: the bricks look lit from below. strengthexaggerates the slopes. Higher values give deeper-looking bricks.
✅ Growth Mindset: Upside-Down Light Is a Clue
If your bricks look lit from the wrong side, or the light seems to come from below when the torch is above, nothing is deeply broken. It is almost always one flipped sign in y, and every graphics programmer has shipped that bug to a teammate at least once. Test it the scientific way: put the torch directly above the wall and check that the top edges of the bricks brighten. One experiment, one sign, fixed. Confusion here isn't a sign you can't do graphics; it is the normal first week of doing graphics.
🕯️ Lights on the GPU
On the GPU, every pixel runs Lambert's law for every light, which is exactly what the demo above does. The fragment shader loops over an array of lights:
#define MAX_LIGHTS 8
uniform int u_light_count;
uniform vec3 u_light_pos[MAX_LIGHTS];    // x, y in pixels (y up), z = height above the wall
uniform vec3 u_light_color[MAX_LIGHTS];

void main() {
    vec3 albedo = texture(u_albedo, v_uv).rgb;
    vec3 n = normalize(texture(u_normals, v_uv).rgb * 2.0 - 1.0);   // 0..1 back to -1..1
    vec3 frag = vec3(v_uv * u_resolution, 0.0);                      // this pixel, in pixels
    vec3 light = u_ambient;
    for (int i = 0; i < u_light_count; i++) {
        vec3 to_light = u_light_pos[i] - frag;
        float d = length(to_light);
        float diffuse = max(dot(n, to_light / d), 0.0);   // Lambert: facing the light = bright
        float falloff = 1.0 / (1.0 + 0.004 * d + 0.00002 * d * d);
        light += u_light_color[i] * diffuse * falloff;
    }
    f_color = vec4(clamp(albedo * light, 0.0, 1.0), 1.0);
}- The z height. Each light hangs a little in front of the wall (z > 0). A low torch skims across the surface and exaggerates every bump; a high one lights the wall more evenly. That single number is a strong mood control.
- Brighter than white. Light colors may exceed 1.0 (the torch uses 1.6 for red), and the sum is clamped only at the end. Unlike the multiply blend, this can light a surface up to its full albedo and let colors saturate.
- Fixed-size arrays. GLSL arrays have a size fixed at compile time. Upload a full array every frame, padding unused slots with zeros, and tell the shader how many are real with
u_light_count.
From Python, the upload converts each light from pygame's y-down pixels to the shader's y-up ones and fills the arrays:
def render(self, target, lights, ambient, use_normals=True):
    """lights: list of ((x, y_down, z), (r, g, b)) with colors 0..1 (brighter is allowed)."""
    lights = lights[:MAX_LIGHTS]
    pos = [(x, self.size[1] - y, z) for (x, y, z), _ in lights]      # flip y to "up"
    col = [color for _, color in lights]
    pad = [(0.0, 0.0, 0.0)] * (MAX_LIGHTS - len(lights))              # arrays are fixed-size
    ...
    set_uniform(self.prog, "u_light_count", len(lights))
    set_uniform(self.prog, "u_light_pos", pos + pad)
    set_uniform(self.prog, "u_light_color", col + pad)
If you forget this upload, nothing crashes: the arrays stay at zero, the loop adds no light, and you see only the ambient color. When a lit scene looks suspiciously flat and dim, check the upload first.
The cost of this shader grows with pixels × lights. On the machine used to write this lesson (Intel UHD 770 graphics under WSL2), lighting the 960 × 540 wall took about 0.7 ms with 3 lights and about 1.0 ms with all 8 slots in use; measure on the hardware you care about. For dozens of lights, games draw each light as its own small quad added into a light texture, which is the lightmap idea from earlier moved onto the GPU.
🏋️ Practice Exercise: Torchlit Wall
Objective: light a pygame-drawn brick wall on the GPU with a mouse-driven torch and two colored lamps, using a normal map you compute from a height map.
Time: about 50 minutes. Starter file: normal_lighting_starter.py (your instructor has it). The scaffold, the brick drawing, the textures and the keys are done. Its numbered to-do comments match the steps below.
- Run the starter. You see the bricks, but only the dim ambient light reaches them. (≈ 3 min)
- In
WallLighting.render(), upload the lights:u_light_countand the paddedu_light_posandu_light_colorarrays. The torch now follows the mouse, lighting by distance only. (≈ 10 min) - In
LIGHT_FRAG, replacediffuse = 1.0with Lambert's law. With flat normals the change is subtle; that is expected. (≈ 7 min) - Write
normal_map_from_height(): slopes withnp.gradient, the normal(-dh_dx * strength, dh_dy * strength, 1)made unit length, and packed into colors. The bricks' edges now catch the light. (≈ 20 min) - Experiment: press N to compare with flat normals, Up and Down to raise and lower the torch, and 1 to 3 to switch lights. Put the torch right above a brick and check that its top edge is the bright one. (≈ 10 min)
You are done when:
- brick edges facing the torch are bright and edges facing away are dark, and they swap as the torch moves past;
- N turns the relief off and on, and a lower torch makes the bricks look deeper;
- the two lamps tint their corners blue and green, and their light adds to the torch's where they overlap;
- closing the window prints
Lights in the last frame:andFrames drawn:.
💡 Hint
If the relief looks inverted (bricks lit from below when the torch is above), check the sign of the y part of the normal and that the light's y is flipped with height - y. If the wall stays dark after step 2, print len(lights) and make sure both arrays have exactly MAX_LIGHTS entries after padding. Test the normal map on its own by drawing it: bricks should look light blue, with pinkish right edges and greenish top edges.
✅ Example Solution
The lab file your instructor runs also contains a short block marked lab runtime and and frame_budget() in the loop, so the checker can run it for a fixed number of frames. They are left out here and do nothing when you run it yourself.
"""Torchlit Wall: Advanced Lesson 15 practice exercise (solution).

A brick wall drawn with pygame-ce is lit on the GPU. A normal map, computed
with numpy from a height map, tells the shader which way every pixel of the
wall faces, so the bricks catch the light on the side that faces the torch.
    mouse  move the torch      N  normal map on/off
    1 2 3  toggle the lights   Up/Down  torch height      Esc  quit
"""
import math
import os
import random
import sys

import moderngl
import numpy as np
import pygame


SIZE = (960, 540)


def make_context():
    """Return (ctx, fbo). Window + GL 3.3 core normally; headless EGL under the lab checker."""
    if os.environ.get("LAB_GL") == "egl":
        try:
            ctx = moderngl.create_standalone_context(backend="egl")
        except Exception as exc:
            print("SKIP: no headless OpenGL:", exc)
            sys.exit(77)                      # 77 = SKIP, not FAIL
        fbo = ctx.simple_framebuffer(SIZE)
        fbo.use()
        return ctx, fbo
    pygame.display.gl_set_attribute(pygame.GL_CONTEXT_MAJOR_VERSION, 3)
    pygame.display.gl_set_attribute(pygame.GL_CONTEXT_MINOR_VERSION, 3)
    pygame.display.gl_set_attribute(pygame.GL_CONTEXT_PROFILE_MASK, pygame.GL_CONTEXT_PROFILE_CORE)
    pygame.display.gl_set_attribute(pygame.GL_CONTEXT_FORWARD_COMPATIBLE_FLAG, True)  # macOS
    pygame.display.set_mode(SIZE, pygame.OPENGL | pygame.DOUBLEBUF)
    return moderngl.create_context(), None


MAX_LIGHTS = 8

VERTEX_SHADER = """#version 330 core
in vec2 in_pos;
in vec2 in_uv;
out vec2 v_uv;

void main() {
    v_uv = in_uv;
    gl_Position = vec4(in_pos, 0.0, 1.0);
}
"""

LIGHT_FRAG = """#version 330 core
#define MAX_LIGHTS 8
uniform sampler2D u_albedo;              // the wall's colors
uniform sampler2D u_normals;             // the wall's normal map (xyz packed into rgb)
uniform vec2 u_resolution;               // pixels
uniform vec3 u_ambient;
uniform int u_light_count;
uniform vec3 u_light_pos[MAX_LIGHTS];    // x, y in pixels (y up), z = height above the wall
uniform vec3 u_light_color[MAX_LIGHTS];
uniform bool u_use_normals;
in vec2 v_uv;
out vec4 f_color;

void main() {
    vec3 albedo = texture(u_albedo, v_uv).rgb;
    vec3 n = vec3(0.0, 0.0, 1.0);                        // flat: facing straight out
    if (u_use_normals) {
        n = normalize(texture(u_normals, v_uv).rgb * 2.0 - 1.0);   // 0..1 back to -1..1
    }
    vec3 frag = vec3(v_uv * u_resolution, 0.0);         // this pixel, in pixels
    vec3 light = u_ambient;
    for (int i = 0; i < u_light_count; i++) {
        vec3 to_light = u_light_pos[i] - frag;
        float d = length(to_light);
        float diffuse = max(dot(n, to_light / d), 0.0);  // Lambert: facing the light = bright
        float falloff = 1.0 / (1.0 + 0.004 * d + 0.00002 * d * d);
        light += u_light_color[i] * diffuse * falloff;
    }
    f_color = vec4(clamp(albedo * light, 0.0, 1.0), 1.0);
}
"""

QUAD = np.array([
    # x,    y,    u,   v
    -1.0, -1.0,  0.0, 0.0,
     1.0, -1.0,  1.0, 0.0,
    -1.0,  1.0,  0.0, 1.0,
     1.0,  1.0,  1.0, 1.0,
], dtype="f4")


def set_uniform(prog, name, value):
    """Set a uniform if the shader still has it (GLSL drops uniforms it never uses)."""
    if name in prog:
        prog[name].value = value


def make_bricks(size, seed=7):
    """Return (albedo Surface, height array). Height is (w, h) floats: 1 on bricks, 0 in mortar."""
    rng = random.Random(seed)
    w, h = size
    albedo = pygame.Surface(size)
    albedo.fill((70, 64, 60))                            # mortar
    height = np.zeros((w, h), dtype=np.float32)
    bw, bh, gap = 96, 44, 6
    for row, y in enumerate(range(0, h, bh)):
        offset = (bw // 2) * (row % 2)
        for x in range(-offset, w, bw):
            rect = pygame.Rect(x + gap // 2, y + gap // 2, bw - gap, bh - gap).clip(albedo.get_rect())
            if rect.width <= 0 or rect.height <= 0:
                continue
            shade = rng.randint(-18, 18)
            albedo.fill((150 + shade, 78 + shade // 2, 60 + shade // 3), rect)
            height[rect.left:rect.right, rect.top:rect.bottom] = 1.0
    return albedo, height


def normal_map_from_height(height, strength=6.0, blur=4):
    """Turn a (w, h) height array (y DOWN, like pygame) into (w, h, 3) uint8 normal colors.

    The normals use y UP, matching the texture after pygame.image.tobytes(..., True).
    """
    k = 2 * blur + 1                                     # soften the steps into bevels
    for axis in (0, 1):
        padded = np.pad(height, [(blur, blur) if a == axis else (0, 0) for a in (0, 1)], mode="edge")
        height = sum(np.take(padded, range(i, i + height.shape[axis]), axis=axis)
                     for i in range(k)) / k
    dh_dx = np.gradient(height, axis=0)                  # slope going right
    dh_dy = np.gradient(height, axis=1)                  # slope going DOWN the screen
    n = np.stack([-dh_dx * strength, dh_dy * strength, np.ones_like(height)], axis=-1)
    n /= np.linalg.norm(n, axis=-1, keepdims=True)       # unit length
    return np.clip((n * 0.5 + 0.5) * 255.0 + 0.5, 0, 255).astype(np.uint8)


class WallLighting:
    """The lighting shader plus the wall's two textures."""

    def __init__(self, ctx, albedo, normals_rgb):
        self.prog = ctx.program(vertex_shader=VERTEX_SHADER, fragment_shader=LIGHT_FRAG)
        vbo = ctx.buffer(QUAD.tobytes())
        self.vao = ctx.vertex_array(self.prog, [(vbo, "2f 2f", "in_pos", "in_uv")])
        self.size = albedo.get_size()
        self.albedo = ctx.texture(self.size, 4, pygame.image.tobytes(albedo, "RGBA", True))
        normal_surf = pygame.surfarray.make_surface(normals_rgb)
        self.normals = ctx.texture(self.size, 4, pygame.image.tobytes(normal_surf, "RGBA", True))

    def render(self, target, lights, ambient, use_normals=True):
        """lights: list of ((x, y_down, z), (r, g, b)) with colors 0..1 (brighter is allowed)."""
        lights = lights[:MAX_LIGHTS]
        pos = [(x, self.size[1] - y, z) for (x, y, z), _ in lights]      # flip y to "up"
        col = [color for _, color in lights]
        pad = [(0.0, 0.0, 0.0)] * (MAX_LIGHTS - len(lights))              # arrays are fixed-size
        target.use()
        self.albedo.use(0)
        self.normals.use(1)
        set_uniform(self.prog, "u_albedo", 0)
        set_uniform(self.prog, "u_normals", 1)
        set_uniform(self.prog, "u_resolution", self.size)
        set_uniform(self.prog, "u_ambient", ambient)
        set_uniform(self.prog, "u_use_normals", use_normals)
        set_uniform(self.prog, "u_light_count", len(lights))
        set_uniform(self.prog, "u_light_pos", pos + pad)
        set_uniform(self.prog, "u_light_color", col + pad)
        self.vao.render(moderngl.TRIANGLE_STRIP)


def main():
    pygame.init()
    pygame.display.set_caption("Torchlit Wall")
    ctx, fbo = make_context()
    target = fbo if fbo is not None else ctx.screen

    albedo, height = make_bricks(SIZE)
    try:
        wall = WallLighting(ctx, albedo, normal_map_from_height(height))
    except moderngl.Error as err:
        print("Shader error:\n", err)
        pygame.quit()
        return

    torch = [480.0, 270.0]
    torch_height = 50.0
    on = {1: True, 2: True, 3: True}
    relief_on = True
    number_keys = {pygame.K_1: 1, pygame.K_2: 2, pygame.K_3: 3}
    seconds = 0.0
    frames = 0
    clock = pygame.time.Clock()

    running = True
    while running:
        dt = clock.tick(60) / 1000
        for event in pygame.event.get():
            if event.type == pygame.QUIT:
                running = False
            elif event.type == pygame.MOUSEMOTION:
                torch = [float(event.pos[0]), float(event.pos[1])]
            elif event.type == pygame.KEYDOWN:
                if event.key == pygame.K_ESCAPE:
                    running = False
                elif event.key == pygame.K_n:
                    relief_on = not relief_on
                elif event.key in number_keys:
                    n = number_keys[event.key]
                    on[n] = not on[n]
                elif event.key == pygame.K_UP:
                    torch_height = min(300.0, torch_height + 20.0)
                elif event.key == pygame.K_DOWN:
                    torch_height = max(10.0, torch_height - 20.0)

        seconds += dt
        flicker = 1.0 + 0.08 * math.sin(seconds * 13.0) + 0.05 * math.sin(seconds * 29.0)
        lights = []
        if on[1]:
            lights.append(((torch[0], torch[1], torch_height), (1.6 * flicker, 1.0 * flicker, 0.5 * flicker)))
        if on[2]:
            lights.append(((120.0, 420.0, 90.0), (0.35, 0.55, 1.3)))
        if on[3]:
            lights.append(((850.0, 110.0, 90.0), (0.4, 1.1, 0.5)))

        ctx.clear(0.0, 0.0, 0.0)
        wall.render(target, lights, (0.10, 0.10, 0.14), relief_on)
        if fbo is None:
            pygame.display.flip()
        frames += 1
        pygame.display.set_caption(
            f"Torchlit Wall | normal map {'on' if relief_on else 'off'} | "
            f"{len(lights)} lights | torch height {torch_height:.0f}")

    print(f"Lights in the last frame: {len(lights)}")
    print(f"Frames drawn: {frames}")
    pygame.quit()


if __name__ == "__main__":
    main()
📓 Learning Journal
Take five minutes to write in your learning journal (a notebook or a plain text file works). Jot down:
- Key concepts you learned today
- Techniques that clicked (and the ones that haven't, yet)
- Questions or confusion to bring to the next session
- Ideas to try in your own game
- Progress and feelings: how did this lesson go for you?
✍️ This lesson's prompts:
- Explain to a friend why lights are added to each other but the lightmap is multiplied onto the scene. What would go wrong the other way around?
- When would you choose the plain pygame lightmap over the GPU version for your own game, and why?
- Describe one moment today when a picture on screen told you what was wrong before any error message did.
📝 Summary
You lit 2D scenes two ways. The classic lightmap adds ambient, point and spot lights onto one Surface and multiplies it onto the scene, with every light shape computed once by numpy and the flashlight simply rotated each frame. Then you moved lighting onto the GPU, where each pixel knows which way it faces from a normal map, computed from a height map with np.gradient. Lambert's law turns that direction into brightness for every light in a uniform array, and a light's height above the wall sets how dramatic the relief looks.
🎓 Key Takeaways
- Final color = albedo × light; lights add together, and ambient is just one more light.
BLEND_RGB_ADDbuilds the lightmap andBLEND_RGB_MULTapplies it; multiply can darken and tint but not brighten.- Precompute light shapes with numpy once and rotate or blit them every frame; never loop over pixels in Python per frame.
- A normal map packs each pixel's facing direction into RGB; (128, 128, 255) faces straight out.
- Lambert:
diffuse = max(dot(N, L), 0). Watch the y sign when moving between pygame and shaders. - Upload lights as fixed-size uniform arrays plus a count, padding unused slots with zeros.
🔭 Looking Ahead
In Adaptive Audio & DSP, you will give your scenes a soundtrack that reacts to the game: numpy-generated sound effects with echo and filtering, and music layers that fade in as the danger rises.
❓ Common Questions
Why is my lightmap scene so dark?
Multiply can only darken, so a scene with dim albedo under a dim lightmap gets very dark. Raise the ambient color, make light colors brighter, or reduce the falloff constants so each light reaches farther. Drawing the lightmap on its own for a moment shows what it contains.
Do I need a separate normal map for every sprite?
Yes: each sprite frame needs a matching normal map of the same size, and it must be flipped along with the sprite when the character turns around (flipping x also flips the normal's x). That is why many 2D games normal-map only walls and large props, and leave small sprites flat.
How do I make shadows behind walls?
Neither method in this lesson blocks light, so light passes through walls. 2D shadows are usually made by casting rays from the light to the corners of wall shapes and filling the dark area between them, or by marching through a map of walls in the shader. Going Further points to a guide.
Can I combine this with the bloom from the last lesson?
Yes, and they suit each other: render the lit wall into a framebuffer instead of the screen, then run the bloom chain on that texture so bright torchlight glows. Only the target of the lighting pass changes.
Why does the torch use a color above 1.0?
Colors in the shader are just numbers until the final clamp. A value of 1.6 means "brighter than a plain white light", which lets the torch reach full brightness on surfaces that face it even after the distance falloff dims it.
🎯 Quick Quiz
Question 1: What does blitting the lightmap with BLEND_RGB_MULT do to a scene pixel?
Question 2: Why does the lightmap lab compute the flashlight cone once and rotate it each frame?
Question 3: A normal-map pixel has the color (128, 128, 255). Which way does that surface face?
Question 4: In diffuse = max(dot(N, L), 0.0), when is a pixel brightest?
Question 5: The mouse is at pygame position (x, y) in a window of height H. What light position do you send to a shader that uses y-up pixels?
🌟 Going Further
- Specular highlights: add a shiny term with the Blinn-Phong half vector,
pow(max(dot(N, normalize(L + V)), 0.0), shininess), where V points out of the screen (0, 0, 1). Give wet stones a high shininess and bricks a low one. - Lit and glowing: render the Torchlit Wall into a framebuffer and run the bloom chain from Post-processing on it.
- Day and night: animate the ambient color and the sun's strength over a few minutes of game time, using
dtin seconds. - 2D shadows: read Red Blob Games' 2D visibility article and cast shadows from wall segments, then multiply the visible area into your lightmap.
- Docs: pygame-ce Surface.blit special flags and surfarray; numpy gradient.