Shaders and Effects
GPU Programming for Visual Effects
Unlock the power of GPU programming! Learn to write vertex and fragment shaders, create stunning visual effects, and implement real-time post-processing that will make your games visually spectacular! 🎨✨🌟
Understanding Shaders
🎨 The Graphics Pipeline Analogy
Think of shaders like an assembly line for pixels:
- Vertex Shader: Positions and transforms geometry
- Fragment Shader: Colors each pixel
- Uniforms: Global variables (time, mouse position)
- Attributes: Per-vertex data (position, color, UV)
- Varyings: Data passed between shaders
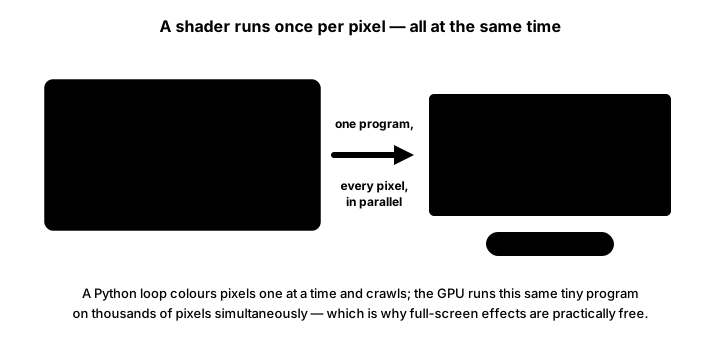
- GPU Parallel: Thousands of pixels processed simultaneously
Interactive Shader Playground
Interact with live shaders! Move your mouse to see effects change in real-time!
Choose Shader Effect:
Shader Implementation in Python/ModernGL
import moderngl
import numpy as np
import pygame
from pygame.locals import *
import time
import math
from typing import Optional

class ShaderRenderer:
    """GPU shader renderer using ModernGL"""
    def __init__(self, width: int = 800, height: int = 600) -> None:
        pygame.init()
        self.width: int = width
        self.height: int = height

        # Create OpenGL context
        pygame.display.set_mode(
            (width, height),
            DOUBLEBUF | OPENGL
        )
        self.ctx: moderngl.Context = moderngl.create_context()

        # Create screen quad
        self.quad: moderngl.Buffer = self.create_quad()
        self.start_time: float = time.time()

    def create_quad(self) -> moderngl.Buffer:
        """Create fullscreen quad"""
        vertices = np.array([
            # x,    y,   u,   v
            [-1.0, -1.0, 0.0, 0.0],
            [ 1.0, -1.0, 1.0, 0.0],
            [-1.0,  1.0, 0.0, 1.0],
            [ 1.0,  1.0, 1.0, 1.0],
        ], dtype='f4')

        vbo = self.ctx.buffer(vertices)
        return vbo

    def compile_shader(self, vertex_shader: str, fragment_shader: str) -> Optional[moderngl.Program]:
        """Compile shader program"""
        try:
            program = self.ctx.program(
                vertex_shader=vertex_shader,
                fragment_shader=fragment_shader
            )
            return program
        except Exception as e:
            print(f"Shader compilation error: {e}")
            return None

    def create_wave_shader(self) -> Optional[moderngl.Program]:
        """Create wave distortion shader"""
        vertex_shader = '''
        #version 330

        in vec2 in_position;
        in vec2 in_texcoord;

        out vec2 v_texcoord;

        uniform float u_time;
        uniform float u_intensity;

        void main() {
            v_texcoord = in_texcoord;
            vec2 pos = in_position;

            // Wave distortion
            pos.y += sin(pos.x * 10.0 + u_time * 2.0) * 0.1 * u_intensity;

            gl_Position = vec4(pos, 0.0, 1.0);
        }
        '''

        fragment_shader = '''
        #version 330

        in vec2 v_texcoord;
        out vec4 f_color;

        uniform float u_time;
        uniform vec2 u_resolution;
        uniform float u_intensity;
        uniform vec3 u_color;

        void main() {
            vec2 uv = v_texcoord;

            // Create wave pattern
            float wave = sin(uv.x * 20.0 + u_time * 2.0);
            wave *= sin(uv.y * 15.0 - u_time * 1.5);
            wave = wave * 0.5 + 0.5;

            vec3 color = mix(vec3(0.1, 0.2, 0.3), u_color, wave);
            color *= u_intensity;

            f_color = vec4(color, 1.0);
        }
        '''

        return self.compile_shader(vertex_shader, fragment_shader)
Post-Processing Effects
class PostProcessing:
    """Post-processing effects pipeline"""
    def __init__(self, ctx: moderngl.Context, width: int, height: int) -> None:
        self.ctx: moderngl.Context = ctx
        self.width: int = width
        self.height: int = height

        # Create framebuffer for rendering
        self.create_framebuffer()

        # Load post-process shaders
        self.effects: dict[str, str] = {
            'bloom': self.create_bloom_shader(),
            'blur': self.create_blur_shader(),
            'chromatic': self.create_chromatic_shader(),
            'vignette': self.create_vignette_shader()
        }

    def create_framebuffer(self) -> None:
        """Create render target"""
        # Color texture
        self.color_texture: moderngl.Texture = self.ctx.texture(
            (self.width, self.height), 4
        )
        self.color_texture.filter = (
            moderngl.LINEAR, moderngl.LINEAR
        )

        # Depth buffer
        self.depth_buffer: moderngl.Renderbuffer = self.ctx.depth_renderbuffer(
            (self.width, self.height)
        )

        # Framebuffer
        self.fbo: moderngl.Framebuffer = self.ctx.framebuffer(
            color_attachments=[self.color_texture],
            depth_attachment=self.depth_buffer
        )

    def create_bloom_shader(self) -> str:
        """Create bloom effect shader"""
        fragment_shader = '''
        #version 330

        in vec2 v_texcoord;
        out vec4 f_color;

        uniform sampler2D u_texture;
        uniform float u_threshold;
        uniform float u_intensity;

        vec3 sample_box(sampler2D tex, vec2 uv, float size) {
            vec3 color = vec3(0.0);
            vec2 texel = 1.0 / textureSize(tex, 0);

            for (int x = -2; x <= 2; x++) {
                for (int y = -2; y <= 2; y++) {
                    vec2 offset = vec2(x, y) * texel * size;
                    color += texture(tex, uv + offset).rgb;
                }
            }

            return color / 25.0;
        }

        void main() {
            vec3 color = texture(u_texture, v_texcoord).rgb;

            // Extract bright areas
            vec3 bright = max(color - u_threshold, 0.0);

            // Blur bright areas
            vec3 bloom = sample_box(u_texture, v_texcoord, 2.0);
            bloom = max(bloom - u_threshold, 0.0);

            // Combine
            color += bloom * u_intensity;

            f_color = vec4(color, 1.0);
        }
        '''

        return fragment_shader
Best Practices
⚡ Shader Tips
- Performance: Minimize texture lookups and complex math
- Precision: Use appropriate float precision (lowp, mediump, highp)
- Branching: Avoid if statements when possible
- Uniforms: Update uniforms sparingly
- Batching: Draw similar objects together
- Mobile: Test on target hardware
- Debugging: Use color outputs for visualization
- Fallbacks: Provide simpler shaders for older hardware
Key Takeaways
- 🎨 Shaders run on the GPU for parallel processing
- 📐 Vertex shaders transform geometry
- 🎯 Fragment shaders color pixels
- 🌊 Uniforms pass data to shaders
- ✨ Post-processing adds polish
- ⚡ GPU programming requires different thinking
- 🔧 GLSL is the shader language
- 📊 Visualize math with colors
🏋️♂️ Practice Exercise
🏋️♂️ Exercise 1: Three Effects, Three Axes — Pixelate (Sampling-Rate Reduction) + Chromatic Aberration (Per-Channel Decomposition) + Wave (Coordinate Displacement) in One Pygame Window
Objective: Build a runnable pygame program (~95 lines) that distills the lesson's WebGL fragment-shader playground (8-effect canvas demo) plus the moderngl `ShaderRenderer` + `PostProcessing` GLSL classes into a 2D pygame demo so each fragment-shader operating principle is visible per frame. The window is 1088×480 split into a 768×480 scene area (a colorful test pattern of bright shapes against a dark background — a high-contrast source whose details survive each effect) and a 320px sidebar. Three orthogonal fragment-shader effect categories are implemented as 2D pygame surface operations that mirror the GLSL shapes from the lesson's playground without writing a single line of GLSL. (a) Pixelate as SAMPLING-RATE REDUCTION — the lesson's GLSL `vec2 quantized = floor(uv / pixelSize) * pixelSize; gl_FragColor = texture2D(u_texture, quantized);` quantizes UV coordinates so many adjacent output pixels sample from the same input texel. The pygame distillation `down = pygame.transform.scale(scene, (W//N, H//N)); pixelated = pygame.transform.scale(down, (W, H))` is the same operation at surface scope: the downsample step throws away (1 − 1/N²) of the spatial detail by keeping only one source pixel per N×N block; the nearest-neighbor upsample repaints each kept pixel as an N×N block of identical color. P toggles pixelate ON/OFF, +/− adjust N (range 2–32). (b) Chromatic aberration as PER-CHANNEL DECOMPOSITION — the lesson's GLSL `col.r = texture2D(u_tex, uv + offset).r; col.g = texture2D(u_tex, uv).g; col.b = texture2D(u_tex, uv − offset).b;` reads each color channel from a different UV offset, then composes the three independent samples into one output RGB. The pygame distillation uses numpy `arr_r = np.roll(arr[..., 0], +shift, axis=1)` for red and `arr_b = np.roll(arr[..., 2], −shift, axis=1)` for blue (green untouched) — same per-channel-offset shape: each output channel gets its data from a different source location. Visible at high-contrast edges as red/cyan and blue/yellow fringes — the canonical lens-aberration look. C toggles ON/OFF, T/Y adjust shift in pixels. (c) Wave distortion as COORDINATE DISPLACEMENT — the lesson's GLSL `pos.y += sin(pos.x * 10.0 + u_time) * 0.05;` (vertex form) or equivalently `uv.y += sin(uv.x * 10.0 + u_time) * 0.05;` (fragment form) modifies the SAMPLE POSITION before the texture lookup, so the output color of pixel (x, y) is the input color at (x, y + sin_offset). The pygame distillation builds each output column x by sampling rows at indices `(np.arange(H) + int(amplitude * sin(2π * x / period + phase))) % H` — the input rows themselves don't move, the SAMPLE POSITIONS move per output column. W toggles ON/OFF, A/Z adjust amplitude (0–30 px). The three effects span three orthogonal axes of fragment-shader pixel work: SAMPLING-RATE REDUCTION (input quantization), PER-CHANNEL DECOMPOSITION (output composition), and COORDINATE DISPLACEMENT (input position shift). All three are fragment-shader pixel-processing passes that read one buffer and write another), graphics_ui_hud (UI is screen-space and 2D-blit-driven, NOT shader-driven; this lesson's effects are content-space and shader-driven — providing the contrast: shaders for content/effects, 2D blits for UI), graphics_procedural (procedural noise produces a heightmap that a fragment shader then samples to color terrain
Instructions:
- Set up a 1088×480 pygame window (W=1088, H=480) with a 768×480 scene area on the left and a 320px sidebar on the right. Build a static scene_surface in code as the source for all effects: fill black, then draw a few brightly-colored shapes (white/red/cyan/yellow rectangles plus a colored triangle and a few high-contrast bands) so chromatic fringes and wave bends are visibly readable against the dark background. Pre-convert the scene_surface to a numpy array via `pygame.surfarray.pixels3d(scene_surface).copy()` once at startup so the per-effect numpy operations don't re-read pixels each frame.
- Implement
apply_pixelate(surf, n): `down = pygame.transform.scale(surf, (max(1, W_S//n), max(1, H_S//n)))` followed by `up = pygame.transform.scale(down, (W_S, H_S))`. Return `up`. The double-scale round-trip implements UV quantization at surface scope — the first call kills detail by averaging N×N source pixels into one destination pixel; the second call magnifies that destination pixel back to an N×N block of identical color via nearest-neighbor expansion. - Implement
apply_chromatic(arr, shift): build an output array by per-channel `np.roll` along axis=1 (the column/x-axis): `out[..., 0] = np.roll(arr[..., 0], +shift, axis=1)` for red, `out[..., 1] = arr[..., 1]` for green (untouched, anchors the geometry), `out[..., 2] = np.roll(arr[..., 2], −shift, axis=1)` for blue. Each output pixel's RGB is composed from THREE INDEPENDENT samples taken at three different x-positions in the source. Convert back via `pygame.surfarray.make_surface(out)`. - Implement
apply_wave(arr, amplitude, period, phase): pre-compute one row of column shifts `shifts = (amplitude * np.sin(2 * np.pi * np.arange(W_S) / period + phase)).astype(int)` (one int per output column). For each output column x, write `out[x, :, :] = np.roll(arr[x, :, :], shifts[x], axis=0)` — the source rows shift up or down per column, which when blitted produces a wobbling sinusoidal distortion. The displacement happens to SAMPLE POSITIONS not to color values. - Wire the three effect toggles + parameter knobs into the event loop: P toggles pixelate, C toggles chromatic, W toggles wave; +/− adjust pixel block size N (clamped to [2, 32]); T/Y adjust chromatic shift (clamped to [0, 30]); A/Z adjust wave amplitude (clamped to [0, 30]). The wave's `phase` advances `+= 2.0 * dt` per frame so the wave animates over time. Effects compose by application order: chromatic→wave→pixelate per frame (wave first against the array, chromatic on the array, pixelate last on the resulting surface) — pass order is non-commutative the way graphics_postprocessing's ping-pong pipeline showed.
- Render: blit the post-effect surface to the scene area; in the sidebar, render keybinding hints, ON/OFF state for each effect, current N / shift / amplitude values, and FPS via `clock.get_fps()`. Verify visually by toggling each effect alone — pixelate alone produces a blocky retro look; chromatic alone produces red/blue fringing on edges with no geometric distortion; wave alone produces a wobbling sinusoidal bend with no color shift; all three together compose into a heavily-stylized retro CRT-glitch aesthetic.
💡 Hint
Build the source `scene_arr` numpy array ONCE at startup; effects read from `scene_arr` and write to fresh per-frame output arrays so re-toggling effects doesn't require rebuilding the source. `pygame.surfarray.pixels3d` returns a writable view sharing pixel memory with the surface, while `pygame.surfarray.make_surface` and `array3d` produce fresh independent arrays — use `.copy()` after `pixels3d` to avoid surface lock issues. Pygame surface arrays are indexed `[x, y, channel]` (column-major) NOT `[y, x, channel]` like most numpy image conventions, so `np.roll(arr[..., channel], shift, axis=1)` shifts along the y-axis (row) and `axis=0` shifts along the x-axis (column) — the wave displacement uses `axis=0` per column to shift rows. Convert numpy results back to a pygame Surface via `pygame.surfarray.make_surface(out_arr)` which expects the same `(W, H, 3)` column-major shape. The compose order in the loop matters: applying pixelate first then chromatic gives a blocky-then-fringed look; applying chromatic first then pixelate fringes the source edges then quantizes the fringed result — same passes, different finals (non-commutativity at one-line scope). Picking compose-order chromatic→wave→pixelate produces the most legible retro look because pixelate runs last and the blocky structure is what the eye reads as the dominant signal.
✅ Example Solution
import math
import numpy as np
import pygame

W, H = 1088, 480
W_S, H_S = 768, 480  # scene area
FPS = 60

def build_scene() -> pygame.Surface:
    surf = pygame.Surface((W_S, H_S))
    surf.fill((10, 10, 18))
    # bright shapes against dark background — high-contrast edges for fringe + wave
    pygame.draw.rect(surf, (255, 255, 255), (60, 60, 220, 140))
    pygame.draw.rect(surf, (235,  60,  60), (320, 80, 160, 100))
    pygame.draw.rect(surf, ( 60, 220, 235), (520, 60, 180, 200))
    pygame.draw.polygon(surf, (255, 220,  60),
                        [(120, 280), (260, 280), (190, 410)])
    pygame.draw.rect(surf, (180, 240, 120), (300, 320, 380,  20))
    pygame.draw.rect(surf, (220, 120, 220), (300, 360, 380,  20))
    pygame.draw.rect(surf, ( 80, 200, 250), (300, 400, 380,  20))
    return surf

def apply_pixelate(surf: pygame.Surface, n: int) -> pygame.Surface:
    n = max(2, n)
    down = pygame.transform.scale(surf, (max(1, W_S // n), max(1, H_S // n)))
    return pygame.transform.scale(down, (W_S, H_S))

def apply_chromatic(arr: np.ndarray, shift: int) -> np.ndarray:
    out = arr.copy()
    out[..., 0] = np.roll(arr[..., 0],  shift, axis=0)  # red shifts +x
    out[..., 2] = np.roll(arr[..., 2], -shift, axis=0)  # blue shifts -x
    # green untouched — anchors the geometry
    return out

def apply_wave(arr: np.ndarray, amplitude: int, period: float, phase: float) -> np.ndarray:
    out = arr.copy()
    cols = np.arange(W_S)
    shifts = (amplitude * np.sin(2.0 * np.pi * cols / period + phase)).astype(np.int32)
    for x in range(W_S):
        out[x, :, :] = np.roll(arr[x, :, :], int(shifts[x]), axis=0)
    return out

def main() -> None:
    pygame.init()
    screen = pygame.display.set_mode((W, H))
    pygame.display.set_caption('Three Effects, Three Axes')
    font = pygame.font.SysFont('consolas', 16)
    clock = pygame.time.Clock()

    scene_surf = build_scene()
    scene_arr  = pygame.surfarray.pixels3d(scene_surf).copy()

    pix_on, chr_on, wav_on = True, True, True
    pix_n, chr_shift, wav_amp = 6, 8, 12
    wav_period, wav_phase = 80.0, 0.0

    running = True
    while running:
        dt = clock.tick(FPS) / 1000.0
        wav_phase += 2.0 * dt

        for e in pygame.event.get():
            if e.type == pygame.QUIT:
                running = False
            elif e.type == pygame.KEYDOWN:
                if   e.key == pygame.K_p: pix_on = not pix_on
                elif e.key == pygame.K_c: chr_on = not chr_on
                elif e.key == pygame.K_w: wav_on = not wav_on
                elif e.key in (pygame.K_PLUS, pygame.K_EQUALS):
                    pix_n = min(32, pix_n + 1)
                elif e.key == pygame.K_MINUS:
                    pix_n = max(2, pix_n - 1)
                elif e.key == pygame.K_t: chr_shift = min(30, chr_shift + 1)
                elif e.key == pygame.K_y: chr_shift = max(0,  chr_shift - 1)
                elif e.key == pygame.K_a: wav_amp = min(30, wav_amp + 1)
                elif e.key == pygame.K_z: wav_amp = max(0,  wav_amp - 1)

        # compose order: wave -> chromatic on array, then pixelate on surface
        cur = scene_arr
        if wav_on: cur = apply_wave(cur, wav_amp, wav_period, wav_phase)
        if chr_on: cur = apply_chromatic(cur, chr_shift)
        out_surf = pygame.surfarray.make_surface(cur)
        if pix_on: out_surf = apply_pixelate(out_surf, pix_n)

        screen.fill((6, 6, 10))
        screen.blit(out_surf, (0, 0))
        pygame.draw.line(screen, (60, 60, 70), (W_S, 0), (W_S, H_S), 1)

        lines = [
            'Three Effects, Three Axes',
            f'P pixelate   {"ON " if pix_on else "OFF"}   N={pix_n}',
            f'C chromatic  {"ON " if chr_on else "OFF"}   shift={chr_shift}',
            f'W wave       {"ON " if wav_on else "OFF"}   amp={wav_amp}',
            '',
            '+/-  pixel block size',
            'T/Y  chromatic shift',
            'A/Z  wave amplitude',
            '',
            f'FPS  {clock.get_fps():5.1f}',
        ]
        for i, line in enumerate(lines):
            screen.blit(font.render(line, True, (220, 230, 240)),
                        (W_S + 16, 16 + i * 22))

        pygame.display.flip()
    pygame.quit()

if __name__ == '__main__':
    main()
🎯 Quick Quiz
Question 1: The lesson's WebGL pixelate shader writes `vec2 quantized = floor(uv / pixelSize) * pixelSize; gl_FragColor = texture2D(u_texture, quantized);`. The pygame distillation in this exercise uses `down = pygame.transform.scale(surf, (W//N, H//N)); pixelated = pygame.transform.scale(down, (W, H))` — a downsample-then-nearest-neighbor-upsample round-trip. Both approaches produce the same blocky retro aesthetic. What architectural operation does pixelate fundamentally implement?
Question 2: The lesson's WebGL chromatic-aberration shader writes `col.r = texture2D(u_tex, uv + offset).r; col.g = texture2D(u_tex, uv).g; col.b = texture2D(u_tex, uv − offset).b; gl_FragColor = vec4(col, 1.0);`. The pygame distillation in this exercise uses `out[..., 0] = np.roll(arr[..., 0], +shift, axis=0)` for red and `out[..., 2] = np.roll(arr[..., 2], −shift, axis=0)` for blue, leaving green untouched. The visible result is the canonical color-fringing-at-edges look: high-contrast edges show red/cyan fringes on one side and blue/yellow fringes on the other. What architectural pattern does chromatic aberration fundamentally implement?
Question 3: The lesson's WebGL wave shader runs `pos.y += sin(pos.x * 10.0 + u_time) * 0.05;` (vertex form) or equivalently `uv.y += sin(uv.x * 10.0 + u_time) * 0.05;` (fragment form) BEFORE the texture sample, then the sampling proceeds normally with the modified position. The pygame distillation builds each output column x by sampling the input rows at indices `(np.arange(H) + int(amplitude * sin(2π * x / period + phase))) % H` — the displacement is applied to the SAMPLE POSITION before reading the source pixel. What architectural axis does wave distortion occupy that chromatic aberration (Q2) does NOT?
What's Next?
Now that you understand shaders, next we'll explore lighting systems to create atmospheric and realistic illumination!