Lesson 14: Parallax Scrolling
A flat 2D level can suddenly feel deep when distant hills drift slowly, nearby trees rush past, and grass sweeps in front of the hero. In this lesson you build that effect, parallax scrolling, from one multiplication, one modulo and the order you draw things in.
🎯 Learning Objectives
By the end of this lesson, you will be able to:
- Explain how a layer's scroll factor turns the camera position into that layer's offset.
- Tile a layer forever with a modulo offset, and work out how many copies cover the screen.
- Draw layers back to front, with a true foreground layer drawn after the player.
- Build layers and see-through haze once, on
SRCALPHAsurfaces, instead of redrawing them every frame.
Project: Parallax Walk, a hero walking through a world three screens wide past clouds, mountains, hills and a fence that passes in front.
In This Lesson
🚂 The Train Window
Look out of the window of a moving train. The fence posts next to the track flash past. Houses a field away slide by more slowly. Mountains on the horizon barely move, and the moon seems to ride along with you. Nothing told your brain how far away each thing is, yet you know: the farther away something is, the slower it seems to move.
Parallax scrolling fakes that depth. You split the scenery into flat layers, like the painted flats of a stage set, and scroll each one at its own speed relative to the camera.
Watch the camera glide (press Play if the demo is paused), then switch parallax off: every layer moves together and the scene goes flat. Switch it back on, then move the foreground behind the hero and see what you lose.
✖️ One Multiplication per Layer
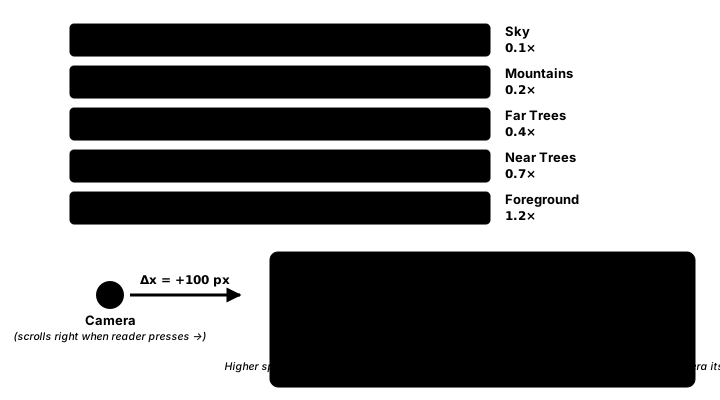
In Cameras you drew everything in the world at world_x - camera_x. That is a layer with a scroll factor of 1. Parallax just lets each layer use its own factor:
screen_x = world_x - camera_x * factor| Factor | How it moves | Use it for |
|---|---|---|
| 0 | Never moves | Sky gradient, sun, moon |
| between 0 and 1 | Slower than the camera; smaller is farther | Clouds, mountains, distant trees |
| 1 | Exactly with the world | Ground, platforms, the player, enemies |
| above 1 | Faster than the camera | Foreground grass, posts, leaves that pass in front |
If the camera also moves up and down, give each layer a vertical factor too: screen_y = world_y - camera_y * factor_y. Vertical factors are usually smaller than horizontal ones, so distant scenery doesn't bob up and down with every jump.
🔮 Predict, then run
The camera moves 300 px to the right. How far, and in which direction, does a layer with factor 0.5 move on screen? And one with factor 1.3? Check your answer against the numbers along the top of the exercise window when you build it.
♾️ Tiling Forever with Modulo
A mountain layer 800 px wide runs out after the camera has moved 800 ÷ 0.2 = 4000 px. You could paint a gigantic image, but it's easier to repeat the same image side by side. The modulo operator % does the bookkeeping: it wraps the layer's offset into one tile width, however far the camera has gone.
def tile_positions(camera_x, factor, width, screen_w=SCREEN_W):
    """Screen x of every copy of a `width`-wide layer needed to cover the screen."""
    x = -(camera_x * factor) % width        # in [0, width)
    if x > 0:
        x -= width                          # start at or left of the screen edge
    positions = []
    while x < screen_w:
        positions.append(x)
        x += width
    return positions
Line by line:
-(camera_x * factor)is where the layer would be if it were infinitely wide. It is negative because the scenery moves left when the camera moves right.% widthwraps that into 0 up to (but not including)width. In Python,%with a positive right side never returns a negative number, even for a negative left side:-250 % 800is550.- If the first copy would start to the right of 0, there would be a gap at the left edge, so step back one width.
- Then add copies until the right edge is covered. For a layer as wide as the screen, that is at most 2 copies; in general, at most
ceil(screen_w / width) + 1.
For the copies to join invisibly, the image's left and right edges must match. For a drawn silhouette, make the first and last heights the same. Here is a complete program with three layers and a camera that scrolls by itself:
import pygame

SCREEN_W, SCREEN_H = 800, 400
CAMERA_SPEED = 150          # px/s: the camera scrolls right by itself


def tile_positions(camera_x, factor, width):
    """Screen x of every copy of a width-wide layer needed to cover the screen."""
    x = -(camera_x * factor) % width        # wrap into [0, width)
    if x > 0:
        x -= width                          # first copy starts at or left of 0
    positions = []
    while x < SCREEN_W:
        positions.append(x)
        x += width
    return positions


def make_hills(color, heights):
    """A silhouette layer. heights[0] == heights[-1], so the edges line up."""
    layer = pygame.Surface((SCREEN_W, SCREEN_H), pygame.SRCALPHA)
    step = SCREEN_W / (len(heights) - 1)
    points = [(i * step, SCREEN_H - h) for i, h in enumerate(heights)]
    pygame.draw.polygon(layer, color, points + [(SCREEN_W, SCREEN_H), (0, SCREEN_H)])
    return layer


pygame.init()
screen = pygame.display.set_mode((SCREEN_W, SCREEN_H))
pygame.display.set_caption("Parallax Basics")
clock = pygame.time.Clock()

# Built ONCE, listed back to front: (surface, factor)
layers = [
    (make_hills((110, 100, 160), [180, 260, 210, 300, 190, 180]), 0.2),
    (make_hills((70, 130, 100), [120, 160, 110, 150, 130, 140, 120]), 0.5),
    (make_hills((40, 80, 50), [60, 80, 50, 90, 60]), 1.0),
]
camera_x = 0.0

running = True
while running:
    dt = clock.tick(60) / 1000
    for event in pygame.event.get():
        if event.type == pygame.QUIT:
            running = False
    camera_x += CAMERA_SPEED * dt

    screen.fill((150, 190, 235))                        # the sky never moves
    for surf, factor in layers:                         # back to front
        for x in tile_positions(camera_x, factor, surf.get_width()):
            screen.blit(surf, (x, 0))
    pygame.display.flip()

pygame.quit()
The layers are drawn once, before the loop. Each frame is just a handful of blit calls, however detailed the pictures are.
✅ Growth Mindset: Seams Are Part of the Process
Your first tiled layer will probably show a gap, a seam or a copy that jumps. That doesn't mean you can't do this; it means the numbers don't line up yet. Print the list from tile_positions for a few camera values, or draw a thin red line at every tile edge. A gap at the left means the "step back one width" is missing; a seam means the picture's two edges don't match; a jump means the width you pass in is not the surface's real width.
🎨 Back to Front, and a Real Foreground
pygame has no depth buffer: whatever you draw last ends up on top. So draw like a painter, from the back to the front (the painter's algorithm): sky, clouds, mountains, hills, then the world with the player, and last the foreground. If the grass layer is drawn before the player, it is hidden behind them, and a factor above 1 just makes the ground look like it is sliding.
screen.blit(sky, (0, 0))                        # factor 0
for surf, factor, y in back_layers:             # far to near, factors below 1
    for x in tile_positions(camera_x, factor, surf.get_width()):
        screen.blit(surf, (x, y))
screen.blit(haze, (0, 0))                       # see-through fog between far and near
draw_world_and_player()                         # factor 1
surf, factor, y = front_layer                   # factor above 1, drawn LAST
for x in tile_positions(camera_x, factor, surf.get_width()):
    screen.blit(surf, (x, y))
Three details make the layers look right:
- See-through layers need
SRCALPHA. Create them withpygame.Surface(size, pygame.SRCALPHA), so the empty parts are transparent. On a plain Surface, the alpha in a color like(230, 210, 220, 80)is ignored and the fog would be a solid wall. - Haze adds distance. Real distant hills look paler and bluer. A haze layer, drawn once with alpha that grows toward the horizon and blitted between the far and near layers, fades only what is behind it.
- Give every piece its own spot. The exercise keeps its clouds in a list of
(x, y)positions and draws one cloud per entry. A common bug is computing one position and drawing every cloud there, so six clouds look like one. Keep each piece a little inside the layer's edges, or it will be cut off where two copies meet.
🏋️ Practice Exercise: Parallax Walk
Objective: make a hero's walk through a wide world look deep, with layers that scroll at their own speeds, tile forever, and a fence that passes in front.
Time: about 25 minutes. Starter file: parallax_starter.py (your instructor has it). It builds every layer and follows the hero with a smooth camera, but all the layers move together, the scenery runs out, and the fence is hidden. Its numbered comments match the steps below.
- Run the starter and walk right. Watch the scenery slide off and leave the sky behind. (≈ 2 min)
- Finish
tile_positions()with the modulo offset and the loop of copies. (≈ 8 min) - Give the clouds, mountains and hills the factors 0.1, 0.2 and 0.5. (≈ 3 min)
- Move the foreground drawing after the player. (≈ 4 min)
- Blit the haze between the far layers and the world, and toggle it with F. (≈ 4 min)
- Walk to both ends of the world and watch the offsets along the top. (≈ 4 min)
You are done when:
- far layers crawl, near layers move faster, and the fence posts rush past faster than the ground;
- there is never a gap or a seam at either edge of the window, anywhere in the world;
- the fence and grass pass in front of the hero;
- F turns the haze on and off, and distant layers look paler with it on.
💡 Hint
If a gap appears at the left edge now and then, the first copy starts to the right of 0: subtract one width when x > 0. If the fence moves the wrong way, check the minus sign in -(camera_x * factor). For the order, remember that the last thing drawn ends up on top.
✅ Example Solution
If your instructor hands you the lab file, you will see a few extra lines marked lab runtime near the top, plus an extra and frame_budget() condition on the main loop. They let the instructor's checker run the program automatically for a fixed number of frames; when you run it yourself they do nothing. You never need to write them.
"""Parallax Walk: Intermediate Lesson 14 practice exercise (solution).

Five layers scroll at different speeds behind (and one in front of) a
player who walks through a world three screens wide. Each layer is built
once, tiles forever with a modulo offset, and is drawn back to front.

Controls: Left/Right or A/D to walk. F toggles the haze.
"""
import math

import pygame


SCREEN_W, SCREEN_H = 800, 450
WORLD_W = 2400
GROUND_Y = 380
FPS = 60
WALK_SPEED = 260            # px/s
CAMERA_SMOOTHING = 6        # higher = snappier follow (Cameras lesson)
TEXT_COLOR = (240, 240, 245)


def tile_positions(camera_x, factor, width, screen_w=SCREEN_W):
    """Screen x of every copy of a `width`-wide layer needed to cover the screen.

    The layer moves camera_x * factor pixels. The modulo wraps that into
    one tile width, and the first copy starts at or left of x = 0.
    """
    x = -(camera_x * factor) % width        # in [0, width)
    if x > 0:
        x -= width                          # start at or left of the screen edge
    positions = []
    while x < screen_w:
        positions.append(x)
        x += width
    return positions


def make_sky():
    """Vertical gradient, never scrolls. Colors are clamped (Intro Lesson 2)."""
    sky = pygame.Surface((SCREEN_W, SCREEN_H))
    top, bottom = (40, 70, 140), (250, 170, 120)
    for y in range(SCREEN_H):
        t = y / (SCREEN_H - 1)
        color = [max(0, min(255, int(a + (b - a) * t))) for a, b in zip(top, bottom)]
        pygame.draw.line(sky, color, (0, y), (SCREEN_W, y))
    return sky


CLOUD_SPOTS = [(90, 60), (250, 120), (400, 45), (540, 100), (690, 70), (150, 165)]
RIDGE_FAR = [150, 60, 110, 20, 90, 150]         # heights; first == last so it tiles
RIDGE_NEAR = [70, 40, 65, 20, 55, 35, 60, 25, 70]
TUFT_XS = [20, 150, 260, 330, 470, 540, 610, 720]


def make_clouds():
    layer = pygame.Surface((SCREEN_W, 200), pygame.SRCALPHA)
    for cx, cy in CLOUD_SPOTS:              # each cloud gets its OWN spot
        for i in range(3):
            pygame.draw.circle(layer, (255, 255, 255, 170), (cx + i * 22 - 22, cy - (i % 2) * 8), 18 + i * 3)
    return layer


def make_ridge(color, base_y, heights):
    """A silhouette whose left and right edges line up (heights[0] == heights[-1])."""
    layer = pygame.Surface((SCREEN_W, SCREEN_H), pygame.SRCALPHA)
    step = SCREEN_W / (len(heights) - 1)
    points = [(i * step, base_y - h) for i, h in enumerate(heights)]
    points += [(SCREEN_W, SCREEN_H), (0, SCREEN_H)]
    pygame.draw.polygon(layer, color, points)
    return layer


def make_foreground():
    """Grass tufts and fence posts that pass IN FRONT of the player."""
    layer = pygame.Surface((SCREEN_W, SCREEN_H), pygame.SRCALPHA)
    for x in range(0, SCREEN_W, 200):
        pygame.draw.rect(layer, (60, 40, 30), (x + 90, GROUND_Y - 30, 10, 80))
    for x in TUFT_XS:
        for i in range(5):
            lean = (i - 2) * 3                  # blades fan out
            pygame.draw.line(layer, (30, 90, 40), (x + i * 6, SCREEN_H), (x + i * 6 + lean, GROUND_Y + 25), 3)
    return layer


def make_haze():
    """SRCALPHA fog: thicker near the horizon, clear at the top."""
    haze = pygame.Surface((SCREEN_W, SCREEN_H), pygame.SRCALPHA)
    for y in range(SCREEN_H):
        alpha = max(0, min(255, int(110 * (y / SCREEN_H) ** 2)))
        pygame.draw.line(haze, (230, 210, 220, alpha), (0, y), (SCREEN_W, y))
    return haze


def main():
    pygame.init()
    screen = pygame.display.set_mode((SCREEN_W, SCREEN_H))
    pygame.display.set_caption("Parallax Walk")
    clock = pygame.time.Clock()
    font = pygame.font.Font(None, 22)

    # Build every layer ONCE. (surface, factor, y); drawn in this order: back to front.
    sky = make_sky()
    back_layers = [
        (make_clouds(), 0.1, 20),
        (make_ridge((90, 80, 130), 330, RIDGE_FAR), 0.2, 0),
        (make_ridge((60, 110, 90), 360, RIDGE_NEAR), 0.5, 0),
    ]
    haze = make_haze()
    front_layer = (make_foreground(), 1.3, 0)

    pos = pygame.Vector2(200, GROUND_Y)     # the player's feet, in world coordinates
    camera_x = 0.0
    held_left = held_right = False
    show_haze = True

    running = True
    while running:
        dt = clock.tick(FPS) / 1000
        for event in pygame.event.get():
            if event.type == pygame.QUIT:
                running = False
            elif event.type == pygame.KEYDOWN:
                if event.key in (pygame.K_LEFT, pygame.K_a):
                    held_left = True
                elif event.key in (pygame.K_RIGHT, pygame.K_d):
                    held_right = True
                elif event.key == pygame.K_f:
                    show_haze = not show_haze
            elif event.type == pygame.KEYUP:
                if event.key in (pygame.K_LEFT, pygame.K_a):
                    held_left = False
                elif event.key in (pygame.K_RIGHT, pygame.K_d):
                    held_right = False

        pos.x += (int(held_right) - int(held_left)) * WALK_SPEED * dt
        pos.x = max(20, min(pos.x, WORLD_W - 20))

        # Smooth camera follow, frame-rate independent, clamped to the world.
        target = max(0, min(pos.x - SCREEN_W / 2, WORLD_W - SCREEN_W))
        camera_x += (target - camera_x) * (1 - math.exp(-CAMERA_SMOOTHING * dt))

        # --- draw, back to front -----------------------------------------
        screen.blit(sky, (0, 0))                                   # factor 0: fixed
        for surf, factor, y in back_layers:
            for x in tile_positions(camera_x, factor, surf.get_width()):
                screen.blit(surf, (x, y))
        if show_haze:
            screen.blit(haze, (0, 0))                              # haze sits between far and near

        # World layer (factor 1): ground stripes and the player.
        pygame.draw.rect(screen, (70, 55, 45), (0, GROUND_Y, SCREEN_W, SCREEN_H - GROUND_Y))
        for x in range(0, WORLD_W, 160):
            pygame.draw.rect(screen, (95, 75, 60), (x - camera_x, GROUND_Y, 80, 8))
        body = pygame.FRect(0, 0, 28, 48)
        body.midbottom = (pos.x - camera_x, pos.y)
        pygame.draw.rect(screen, (230, 80, 80), body, border_radius=6)

        # Foreground: factor above 1, drawn AFTER the player so it passes in front.
        surf, factor, y = front_layer
        for x in tile_positions(camera_x, factor, surf.get_width()):
            screen.blit(surf, (x, y))

        offsets = "   ".join(f"x{f}: {camera_x * f:6.0f}" for f in (0.1, 0.2, 0.5, 1.0, 1.3))
        screen.blit(font.render(f"camera {camera_x:6.0f}   {offsets}", True, TEXT_COLOR), (10, 10))
        pygame.display.flip()

    pygame.quit()
    print(f"Layers drawn back to front. Final camera x: {camera_x:.0f}")


if __name__ == "__main__":
    main()
📓 Learning Journal
Take five minutes to write in your learning journal. Jot down:
- Key concepts you learned today
- Techniques that clicked (and the ones that haven't, yet)
- Questions or confusion to bring to the next session
- Ideas to try in your own game
- Progress and feelings: how did this lesson go for you?
✍️ This lesson's prompts:
- Explain to a friend, without code, why a layer with factor 0.2 looks farther away than one with factor 0.5.
- Sketch the layers of a scene you would like to build (a city, a forest, space). Give each layer a factor.
- What was the first visual bug you saw today, and what did it tell you?
📝 Summary
Parallax is the train-window effect: layers farther away move less. Each layer draws at world_x - camera_x * factor, with 0 for a fixed sky, between 0 and 1 for distant scenery, 1 for the world and above 1 for a foreground. A modulo wraps each layer's offset into one tile width so it can repeat forever, and at most ceil(screen_w / width) + 1 copies cover the screen. Layers are drawn back to front, the foreground after the player, and every layer and the haze are built once on SRCALPHA surfaces.
🎓 Key Takeaways
- A layer's offset is
camera_x * factor; smaller factors look farther away. -(camera_x * factor) % widthwraps the offset; start the first copy at or left of 0.- Make a tiling picture's left and right edges match, or you will see a seam.
- Draw back to front; a foreground only works if it is drawn after the player.
- Build layers once; use
SRCALPHAfor anything see-through.
🔭 Looking Ahead
That finishes the platformer module. In the next lesson, Randomness for Games, you learn to use chance on purpose: seeded generators you can replay, weighted loot, and luck that feels fair.
❓ Common Questions
Should the layers use images instead of shapes drawn in code?
Either works. tile_positions only needs the surface's width. For images, load them once with convert_alpha() (convert() for an opaque sky), make sure the art tiles horizontally, and pass surf.get_width().
Why not use subsurface to cut out the visible part of a wide layer?
A subsurface must lie completely inside its parent, so asking for an area that runs past the edge raises a ValueError. Blitting whole copies at the positions from tile_positions handles the wrap-around for free, and pygame skips the parts that fall outside the screen.
Can a layer scroll even when the camera stands still?
Yes. Add a time-based drift to its offset, for example camera_x * factor + drift_speed * elapsed with drift_speed in px/s. Clouds that drift slowly while the hero stands still make a scene feel alive.
Does the foreground block the player's view?
It can. Keep foreground pieces small and spaced out, keep them near the bottom edge, or make them partly transparent. Test by playing, not just by looking at a screenshot.
My camera jitters and the layers shimmer. What's wrong?
Usually the camera itself. Follow the player with the frame-rate-independent smoothing from Cameras (1 - math.exp(-k * dt)) and keep camera_x a float. pygame blits at whole-pixel positions, so a very slow layer steps one pixel at a time; that is expected.
🎯 Quick Quiz
Question 1: The camera moves 100 px to the right. How does a layer with factor 0.2 move on screen?
Question 2: A layer is 800 px wide and so is the screen. At most how many copies does tile_positions return?
Question 3: A grass layer has factor 1.3, but the hero always walks over it instead of behind it. What is wrong?
Question 4: Why does the exercise build every layer once, before the game loop?
Question 5: A fog layer filled with (230, 210, 220, 80) covers the whole scene like a solid wall. What is the most likely cause?
🌟 Going Further
- Vertical parallax: let the hero jump, give the camera a y, and give each layer a vertical factor about half its horizontal one.
- Drifting clouds: add a slow time-based drift to the cloud layer so it moves even when the hero stands still.
- Day and night: add the optional tint from this lesson and a key that speeds up time.
- Autorunner: make the camera scroll by itself at a speed that grows slowly, as in an endless runner.
- Your own art: draw or download tiling layers (check the license, for example CC0), load them once with
convert_alpha(), and swap them in. - Read the docs: the pygame-ce pages for pygame.Surface (
blit,SRCALPHA) and Python's%operator.