Lesson 12: Cameras
The camera decides what the player sees, and a good one is invisible: it keeps the action on screen without jerking, drifting past the level's edges or hiding what is coming. In this lesson you build a camera class with four follow styles, edge clamping and zoom, and try each one on a level twice as tall as the screen.
🎯 Learning Objectives
By the end of this lesson, you will be able to:
- Convert between world and screen coordinates with a camera, in both directions, including zoom.
- Build locked, smooth, deadzone and look-ahead follow modes, and compare how each one feels.
- Explain why
1 - math.exp(-k * dt)gives smoothing that never overshoots and looks the same at any frame rate. - Clamp the camera to the level, and center a level that is smaller than the screen.
- Zoom about the screen center by drawing the world once and scaling it once.
Project: Camera Modes, a two-screen-tall tile level with four switchable camera modes, zoom keys and a debug overlay.
In This Lesson
🎥 World Space and Screen Space
Picture a film set: the set is huge, and the camera operator points a small frame at the part that matters. In a game, everything has a position in the world (the whole level, in pixels), but the window only shows one screen-sized piece of it. The camera is just the world position of that piece's top-left corner. To draw anything, subtract the camera position; to find what the mouse is pointing at, add it back:
screen_pos = world_pos - camera.pos          # where to draw it
world_pos = screen_pos + camera.pos          # what the mouse is over
That is all the Tile Maps lesson did with camera_x. This lesson turns it into a Camera class that owns the position, the follow style and the zoom, so the rest of the game only ever asks it two questions:
class Camera:
    """Where the view is in the world (pos = top-left corner) and how it follows."""

    def __init__(self, screen_size, world_size):
        self.screen_size = pygame.Vector2(screen_size)
        self.world_size = pygame.Vector2(world_size)
        self.pos = pygame.Vector2(0, 0)
        self.zoom = 1.0

    @property
    def view_size(self):
        """How much of the world fits on screen at this zoom."""
        return self.screen_size / self.zoom

    @property
    def center(self):
        return self.pos + self.view_size / 2

    def world_to_screen(self, point):
        return (pygame.Vector2(point) - self.pos) * self.zoom

    def screen_to_world(self, point):
return pygame.Vector2(point) / self.zoom + self.pos(@property lets you read a method like a plain attribute: camera.view_size, with no parentheses, is recalculated every time you read it, so it always matches the current zoom.) The two conversions are exact opposites: undo the multiply with a divide, undo the subtract with an add. Any point you convert to the screen and back lands exactly where it started, which is what makes clicking on things in a scrolled, zoomed world reliable.
🎯 Locked and Smooth Following
The simplest camera is locked: every frame, put the player dead center.
goal = pygame.Vector2(target) - self.view_size / 2    # pos that centers the target
self.pos = goal
It never loses the player, but every tiny movement moves the whole world, and each landing jolts the screen. A smooth camera instead closes part of the gap to the goal each frame. You met the right way to do this in Interpolation & Easing: the fraction to close is 1 - math.exp(-sharpness * dt).
blend = 1 - math.exp(-self.sharpness * dt)    # frame-rate independent smoothing
self.pos += (goal - self.pos) * blend
Why not the shorter self.pos += (goal - self.pos) * sharpness * dt? Two reasons. First, if sharpness * dt ever reaches 1 or more (a sharp camera and one slow frame), the camera lands on the goal or flies past it and swings back: an overshoot. 1 - exp(-x) is always between 0 and 1, so the camera can never pass its goal. Second, the exponential version gives exactly the same motion at 30, 60 or 144 FPS: two frames of 1/60 s close the same share of the gap as one frame of 1/30 s. The linear version doesn't.
sharpness (1/s) | Gap closed per 1/60 s frame | Gap left after 0.5 s | Feel |
|---|---|---|---|
| 2 | 3.3% | 37% | Floaty, cinematic |
| 6 | 9.5% | 5% | Smooth but responsive |
| 15 | 22% | 0.06% | Tight, nearly locked |
Here is a complete top-down playground to feel the difference. Move with the arrow keys and switch modes with 1 and 2:
import math

import pygame

WIDTH, HEIGHT = 800, 600
WORLD_W, WORLD_H = 2400, 1600
SPEED = 320                      # pixels per second
SHARPNESS = 6.0                  # 1/s: bigger = tighter

pygame.init()
screen = pygame.display.set_mode((WIDTH, HEIGHT))
pygame.display.set_caption("Camera Playground")
clock = pygame.time.Clock()
font = pygame.font.Font(None, 28)
player = pygame.Vector2(WORLD_W / 2, WORLD_H / 2)
camera = player - (WIDTH / 2, HEIGHT / 2)
mode = "smooth"

running = True
while running:
    dt = min(clock.tick(60) / 1000, 0.05)
    for event in pygame.event.get():
        if event.type == pygame.QUIT:
            running = False
        elif event.type == pygame.KEYDOWN and event.key == pygame.K_1:
            mode = "locked"
        elif event.type == pygame.KEYDOWN and event.key == pygame.K_2:
            mode = "smooth"

    keys = pygame.key.get_pressed()
    direction = pygame.Vector2(keys[pygame.K_RIGHT] - keys[pygame.K_LEFT],
                               keys[pygame.K_DOWN] - keys[pygame.K_UP])
    if direction.length_squared() > 0:
        direction = direction.normalize()
    player += direction * SPEED * dt
    player.x = max(0, min(player.x, WORLD_W))
    player.y = max(0, min(player.y, WORLD_H))

    goal = player - (WIDTH / 2, HEIGHT / 2)
    if mode == "locked":
        camera = goal
    else:
        camera += (goal - camera) * (1 - math.exp(-SHARPNESS * dt))
    camera.x = max(0, min(camera.x, WORLD_W - WIDTH))      # stay inside the world
    camera.y = max(0, min(camera.y, WORLD_H - HEIGHT))

    screen.fill((22, 28, 40))
    for x in range(int(camera.x // 100) * 100, int(camera.x + WIDTH) + 1, 100):
        pygame.draw.line(screen, (45, 60, 85), (x - camera.x, 0), (x - camera.x, HEIGHT))
    for y in range(int(camera.y // 100) * 100, int(camera.y + HEIGHT) + 1, 100):
        pygame.draw.line(screen, (45, 60, 85), (0, y - camera.y), (WIDTH, y - camera.y))
    pygame.draw.rect(screen, (220, 90, 90), (-camera.x, -camera.y, WORLD_W, WORLD_H), 4)
    pygame.draw.circle(screen, (110, 200, 255), player - camera, 16)
    info = f"Mode: {mode} (1 locked, 2 smooth)   camera ({camera.x:.0f}, {camera.y:.0f})"
    screen.blit(font.render(info, True, (230, 230, 230)), (10, 10))
    pygame.display.flip()

pygame.quit()
🔮 Predict, then run
In smooth mode, run right for a second, then let go. Predict: does the camera stop at the same moment as the player, or after? Run it and watch the grid. Then change SHARPNESS to 2 and to 15 and compare with the table.
📦 Deadzone and Look-Ahead
A deadzone is a box of slack in the middle of the screen. While the player moves inside it, the camera doesn't move at all; when the player pushes past an edge, the camera moves just enough to keep them on that edge. Small hops, bobbing and turning around no longer shake the whole screen.
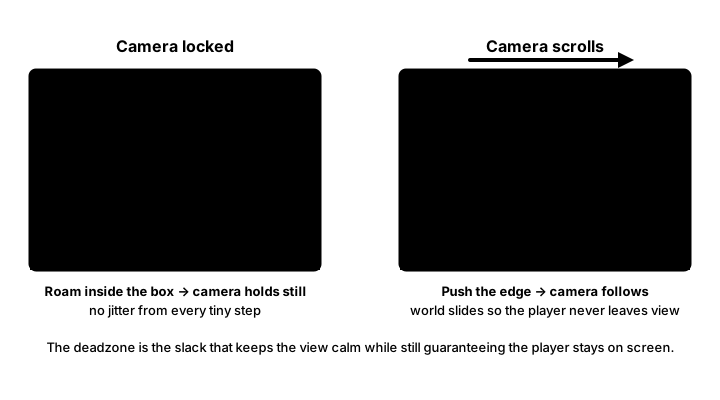
offset = pygame.Vector2(target) - self.center
half = self.deadzone / 2                     # deadzone is a Vector2(width, height)
if offset.x > half.x:
    self.pos.x += offset.x - half.x          # move only by the amount past the edge
elif offset.x < -half.x:
    self.pos.x += offset.x + half.x
if offset.y > half.y:
    self.pos.y += offset.y - half.y
elif offset.y < -half.y:
    self.pos.y += offset.y + half.y
Look-ahead solves a different problem: in a side-scroller, what matters is what is ahead of the player, but a centered camera shows as much behind as in front. So the goal is pushed forward in the facing direction by a lead distance. The lead itself eases toward its new value when the player turns, so the view glides across instead of snapping:
self.lead = 120            # how far ahead to look, in world pixels
self.lead_now = 0.0        # the current lead, which eases toward facing * lead

# in follow(), for the look-ahead mode:
self.lead_now += (facing * self.lead - self.lead_now) * (1 - math.exp(-2.0 * dt))
goal.x += self.lead_now
self.pos += (goal - self.pos) * blend
Two separate numbers, two separate jobs: lead is a distance in pixels, and the 2.0 is a rate (1/s) that sets how quickly the lead swings across when you turn. Try all four modes here; the runner turns around and jumps by itself:
✅ Growth Mindset: "Feel" Is Something You Tune, Not Something You Have
There is no correct camera. Designers try a setting, play for a minute, and adjust, over and over; a camera that feels "off" is a starting point, not a failure. Make tuning cheap: put sharpness, deadzone and lead in constants at the top of the file, turn on the debug overlay, and change one number at a time. Write down what each change felt like; after a few rounds you'll have a real opinion, and that opinion is the skill.
🧱 Clamping to the Level
Follow the player to the level's left edge and a centered camera would show empty space beyond it. Clamping stops the camera at the edges: its position may range from 0 to world size - view size on each axis. If the level is smaller than the view on an axis (a single-room level, or zooming far out), there is no valid range, so center the level instead:
def clamp(self):
    """Keep the view inside the world; center it if the world is smaller."""
    size = self.view_size
    for axis in (0, 1):
        if self.world_size[axis] <= size[axis]:
            self.pos[axis] = (self.world_size[axis] - size[axis]) / 2
        else:
            self.pos[axis] = max(0, min(self.pos[axis], self.world_size[axis] - size[axis]))
(A Vector2 can be indexed like a list: pos[0] is pos.x and pos[1] is pos.y, which lets one loop handle both axes.) Clamp after the follow step, every frame, whatever the mode. Clamping uses view_size, the zoomed size, so a zoomed-in camera can travel further before hitting an edge.
The camera also tells the tile map what to draw. The visible part of the world is the rectangle at camera.pos with size camera.view_size, and the culled drawing loop from Tile Maps simply uses those numbers for its first and last column and row.
🔍 Zoom About the Screen Center
Zooming in by 2 means half as much world fits on screen: view_size becomes screen_size / 2. The trap is where the zoom happens. If you only change the number, the top-left corner stays put and the picture zooms toward the top-left. Players expect it to zoom toward the middle, so remember the world point at the center, change the zoom, and move the camera so that point is in the center again:
def set_zoom(self, zoom):
    """Zoom about the screen center: the world point in the middle stays put."""
    middle = self.center
    self.zoom = max(0.5, min(2.0, zoom))
    self.pos = middle - self.view_size / 2
    self.clamp()
To draw, apply the zoom in exactly one place. Draw the world at normal size onto a surface exactly as big as view_size, using world - camera.pos as usual, then scale that surface to the window once:
size = (math.ceil(camera.view_size.x), math.ceil(camera.view_size.y))
if size not in views:
    views[size] = pygame.Surface(size)       # one view Surface per zoom level, made once
view = views[size]
draw_world(view, camera, body, coins)        # draws at world - camera.pos, no zoom
screen.blit(pygame.transform.scale(view, (WIDTH, HEIGHT)), (0, 0))
If you instead multiplied every position by the zoom and scaled the result, the zoom would be applied twice. pygame.transform.scale is a fast scale that keeps hard pixel edges, which suits pixel art; pygame.transform.smoothscale blends neighboring pixels for a softer look. For things drawn on top of the scaled view, such as a marker over the player or the deadzone box, use world_to_screen, which includes the zoom.
💡 Why this matters
Every other system in a scrolling game depends on the camera: drawing, culling, mouse picking, and later the HUD's minimap. Keeping all of its math in one class, with conversions that are exact inverses, means those systems can't quietly disagree about where things are.
🏋️ Practice Exercise: Camera Modes
Objective: finish a camera class for a two-screen-tall tile level so that keys 1–4 switch between locked, smooth, deadzone and look-ahead following, and Z/X zoom about the center.
Time: about 55 minutes. Starter file: camera_modes_starter.py (your instructor has it). The level, the player (with the per-axis collision and ground probe from Tile Maps), the drawing and the keys are done, and locked mode works. Each step below names what to change, and the starter marks each spot with a numbered to-do comment (the numbers are labels, not step numbers).
- Run the starter and climb the platforms: the camera is locked, and it shows the void past the level's edges. Write
world_to_screenandscreen_to_world. The red debug dot should now sit on the player. (≈ 5 min) - Write
clamp(), including the centering case. The void disappears at the edges. (≈ 10 min) - Add smooth following with
blend = 1 - math.exp(-self.sharpness * dt). Press 2 and compare it with 1. (≈ 5 min) - Add the deadzone mode (3). Tab shows the box: the camera must hold still while you move inside it. (≈ 10 min)
- Add look-ahead (4): ease
lead_nowtowardfacing * lead, add it to the goal, then smooth. (≈ 10 min) - Write
set_zoomso Z and X zoom about the screen center. (≈ 10 min)
You are done when:
- no mode ever shows space past the level's edges; only when you zoom so far out that the whole level fits does it sit centered with sky around it;
- in smooth mode the camera trails the player and settles without swinging past;
- in deadzone mode, small moves inside the yellow box don't move the camera at all;
- in look-ahead mode the player sits off-center, with more room in front of them, and the view glides across when they turn;
- pressing Z keeps the same spot in the middle of the screen while everything gets bigger.
💡 Hint
If the zoom drifts toward the top-left corner, you changed zoom before reading self.center; center depends on view_size, which depends on the zoom. If the deadzone camera jumps to center the player, you are adding the whole offset instead of only the part beyond half. If the smooth camera behaves differently at clock.tick(30), check that you used math.exp.
✅ Example Solution
If your instructor hands you the lab file, you will see a few extra lines marked lab runtime near the top, plus an extra and frame_budget() condition on the main loop. They let the instructor's checker run the program automatically; when you run it yourself they do nothing.
"""Camera Modes: Intermediate Lesson 12 practice exercise (solution).

The Coin Cave level, now two screens tall, seen through a Camera class.
Left/Right run, Space jumps. 1 = locked, 2 = smooth, 3 = deadzone,
4 = look-ahead. Z zooms in, X zooms out (about the screen center).
Tab shows the camera's debug overlay (deadzone box and target).
"""
import math

import pygame


WIDTH, HEIGHT = 640, 480
TILE = 32
GRAVITY = 980
JUMP_SPEED = 560
RUN_SPEED = 220
MAX_FALL = 900
START = (2 * TILE, 20 * TILE)

LEVEL_ROWS = [
    "#..........................................................#",
    "#..........................................................#",
    "#..........................................................#",
    "#..........................................................#",
    "#..........................................................#",
    "#........................................oo................#",
    "#..........................oo...........BBBB...............#",
    "#.........................BBBB.............................#",
    "#..........................................................#",
    "#......................o.........o...................o.....#",
    "#....................BBBB......BBBBB................BBBBB..#",
    "#..........................................................#",
    "#................o.........................................#",
    "#...............BBB............................BBB.........#",
    "#..........................................................#",
    "#............o.............................................#",
    "#...........BBB....................................BBBB....#",
    "#..........................................................#",
    "#......o.........................BBBBB........o............#",
    "#.....BBBB............BBBBB...........#......BBBB..........#",
    "#..................o..................#....................#",
    "#.....................................#..................o.#",
    "##################...####################..#################",
    "##################...####################..#################",
]
SOLID = {"#", "B"}
COLORS = {"#": (110, 76, 50), "B": (170, 92, 70)}
MODES = {pygame.K_1: "locked", pygame.K_2: "smooth", pygame.K_3: "deadzone", pygame.K_4: "lookahead"}


class Camera:
    """Where the view is in the world (pos = top-left corner) and how it follows."""

    def __init__(self, screen_size, world_size):
        self.screen_size = pygame.Vector2(screen_size)
        self.world_size = pygame.Vector2(world_size)
        self.pos = pygame.Vector2(0, 0)
        self.zoom = 1.0
        self.mode = "smooth"
        self.sharpness = 6.0                 # 1/s: bigger = tighter smooth follow
        self.deadzone = pygame.Vector2(160, 120)   # box size in world pixels
        self.lead = 120                      # look-ahead distance in world pixels
        self.lead_now = 0.0                  # current look-ahead offset (eases toward lead)

    @property
    def view_size(self):
        """How much of the world fits on screen at this zoom."""
        return self.screen_size / self.zoom

    @property
    def center(self):
        return self.pos + self.view_size / 2

    def follow(self, target, facing, dt):
        """target: the player's center (Vector2). facing: -1 or 1."""
        size = self.view_size
        goal = pygame.Vector2(target) - size / 2          # pos that centers the target
        blend = 1 - math.exp(-self.sharpness * dt)        # frame-rate independent smoothing
        if self.mode == "locked":
            self.pos = goal
        elif self.mode == "smooth":
            self.pos += (goal - self.pos) * blend
        elif self.mode == "deadzone":
            offset = pygame.Vector2(target) - self.center
            half = self.deadzone / 2
            if offset.x > half.x:
                self.pos.x += offset.x - half.x
            elif offset.x < -half.x:
                self.pos.x += offset.x + half.x
            if offset.y > half.y:
                self.pos.y += offset.y - half.y
            elif offset.y < -half.y:
                self.pos.y += offset.y + half.y
        elif self.mode == "lookahead":
            self.lead_now += (facing * self.lead - self.lead_now) * (1 - math.exp(-2.0 * dt))
            goal.x += self.lead_now
            self.pos += (goal - self.pos) * blend
        self.clamp()

    def snap(self, target):
        """Jump straight to the target, for example when a level starts."""
        self.pos = pygame.Vector2(target) - self.view_size / 2
        self.clamp()

    def clamp(self):
        """Keep the view inside the world; center it if the world is smaller."""
        size = self.view_size
        for axis in (0, 1):
            if self.world_size[axis] <= size[axis]:
                self.pos[axis] = (self.world_size[axis] - size[axis]) / 2
            else:
                self.pos[axis] = max(0, min(self.pos[axis], self.world_size[axis] - size[axis]))

    def set_zoom(self, zoom):
        """Zoom about the screen center: the world point in the middle stays put."""
        middle = self.center
        self.zoom = max(0.5, min(2.0, zoom))
        self.pos = middle - self.view_size / 2
        self.clamp()

    def world_to_screen(self, point):
        return (pygame.Vector2(point) - self.pos) * self.zoom

    def screen_to_world(self, point):
        return pygame.Vector2(point) / self.zoom + self.pos


def solid_squares(rect):
    first_col, first_row = int(rect.left // TILE), int(rect.top // TILE)
    last_col, last_row = int(rect.right // TILE), int(rect.bottom // TILE)
    found = []
    for row in range(max(0, first_row), min(len(LEVEL_ROWS), last_row + 1)):
        for col in range(max(0, first_col), min(len(LEVEL_ROWS[0]), last_col + 1)):
            square = pygame.FRect(col * TILE, row * TILE, TILE, TILE)
            if LEVEL_ROWS[row][col] in SOLID and rect.colliderect(square):
                found.append(square)
    return found


def move_and_collide(body, vel, dt):
    body.x += vel.x * dt
    for square in solid_squares(body):
        if vel.x > 0:
            body.right = square.left
        elif vel.x < 0:
            body.left = square.right
    body.y += vel.y * dt
    for square in solid_squares(body):
        if vel.y > 0:
            body.bottom = square.top
        elif vel.y < 0:
            body.top = square.bottom
        vel.y = 0


def on_ground(body):
    return len(solid_squares(pygame.FRect(body.left, body.bottom, body.width, 1))) > 0


def draw_world(view, camera, body, coins):
    """Draw in world pixels minus camera.pos onto a view-sized surface (no zoom here)."""
    view.fill((120, 180, 235))
    cam_x, cam_y = camera.pos
    first_col, first_row = max(0, int(cam_x // TILE)), max(0, int(cam_y // TILE))
    last_col = min(len(LEVEL_ROWS[0]) - 1, int((cam_x + view.get_width()) // TILE))
    last_row = min(len(LEVEL_ROWS) - 1, int((cam_y + view.get_height()) // TILE))
    for row in range(first_row, last_row + 1):
        for col in range(first_col, last_col + 1):
            ch = LEVEL_ROWS[row][col]
            if ch in COLORS:
                square = pygame.FRect(col * TILE - cam_x, row * TILE - cam_y, TILE, TILE)
                pygame.draw.rect(view, COLORS[ch], square)
                pygame.draw.rect(view, (40, 30, 20), square, 1)
    for coin in coins:
        pygame.draw.circle(view, (250, 210, 60), coin - camera.pos, 8)
    pygame.draw.rect(view, (60, 200, 110), body.move(-cam_x, -cam_y), border_radius=4)


def main():
    pygame.init()
    screen = pygame.display.set_mode((WIDTH, HEIGHT))
    pygame.display.set_caption("Camera Modes")
    clock = pygame.time.Clock()
    font = pygame.font.Font(None, 26)
    world_size = (len(LEVEL_ROWS[0]) * TILE, len(LEVEL_ROWS) * TILE)
    camera = Camera((WIDTH, HEIGHT), world_size)
    coins = [pygame.Vector2(col * TILE + TILE / 2, row * TILE + TILE / 2)
             for row, line in enumerate(LEVEL_ROWS) for col, ch in enumerate(line) if ch == "o"]
    body = pygame.FRect(START, (24, 30))
    camera.snap(body.center)
    vel = pygame.Vector2(0, 0)
    facing = 1
    grounded = False
    debug = True
    views = {}                                   # one view Surface per zoom level, built once
    used = []

    running = True
    while running:
        dt = min(clock.tick(60) / 1000, 0.05)
        for event in pygame.event.get():
            if event.type == pygame.QUIT:
                running = False
            elif event.type == pygame.KEYDOWN:
                if event.key in MODES:
                    camera.mode = MODES[event.key]
                    used.append(camera.mode)
                elif event.key == pygame.K_z:
                    camera.set_zoom(camera.zoom * 1.25)
                elif event.key == pygame.K_x:
                    camera.set_zoom(camera.zoom / 1.25)
                elif event.key == pygame.K_TAB:
                    debug = not debug
                elif event.key in (pygame.K_SPACE, pygame.K_UP) and grounded:
                    vel.y = -JUMP_SPEED

        keys = pygame.key.get_pressed()
        vel.x = (keys[pygame.K_RIGHT] - keys[pygame.K_LEFT]) * RUN_SPEED
        if vel.x != 0:
            facing = 1 if vel.x > 0 else -1
        vel.y = min(vel.y + GRAVITY * dt, MAX_FALL)
        move_and_collide(body, vel, dt)
        grounded = on_ground(body)
        coins = [c for c in coins if not body.collidepoint(c)]
        if body.top > world_size[1]:
            body.topleft = START
            vel.update(0, 0)

        camera.follow(body.center, facing, dt)

        # Draw the world at 1:1 into a view the size of what the camera sees,
        # then scale that once to the screen: zoom is applied in exactly one place.
        size = (math.ceil(camera.view_size.x), math.ceil(camera.view_size.y))
        if size not in views:
            views[size] = pygame.Surface(size)
        view = views[size]
        draw_world(view, camera, body, coins)
        if camera.zoom == 1.0:
            screen.blit(view, (0, 0))
        else:
            screen.blit(pygame.transform.scale(view, (WIDTH, HEIGHT)), (0, 0))

        if debug:
            middle = pygame.Vector2(WIDTH, HEIGHT) / 2
            if camera.mode == "deadzone":
                box = pygame.FRect((0, 0), camera.deadzone * camera.zoom)
                box.center = middle
                pygame.draw.rect(screen, (255, 240, 90), box, 2)
            pygame.draw.circle(screen, (255, 80, 80), camera.world_to_screen(body.center), 4)
            pygame.draw.line(screen, (255, 255, 255), middle - (8, 0), middle + (8, 0))
            pygame.draw.line(screen, (255, 255, 255), middle - (0, 8), middle + (0, 8))
        hud = (f"Mode: {camera.mode} (1-4)   Zoom {camera.zoom:.2f} (Z/X)   "
               f"Coins left {len(coins)}   Tab: debug")
        screen.blit(font.render(hud, True, (20, 20, 30)), (10, 8))
        pygame.display.flip()

    pygame.quit()
    print("Modes used:", ", ".join(used))
    print(f"Final zoom: {camera.zoom:.2f}")


if __name__ == "__main__":
    main()
📓 Learning Journal
Take five minutes to write in your learning journal (a notebook or a plain text file works). Jot down:
- Key concepts you learned today
- Techniques that clicked (and the ones that haven't, yet)
- Questions or confusion to bring to the next session
- Ideas to try in your own game
- Progress and feelings: how did this lesson go for you?
✍️ This lesson's prompts:
- Describe how each of the four modes felt to play. Which would you pick for a precise platformer, a relaxed exploration game and a fast runner, and why?
- Explain to a friend why
pos += gap * k * dtcan overshoot butpos += gap * (1 - exp(-k * dt))can't. - Think of a game whose camera annoyed you. What was it doing, and which setting from this lesson would fix it?
📝 Summary
A camera is a world position: subtract it to draw, add it back to pick, and multiply or divide by the zoom in the same two conversions. You built four ways to move it. Locked is exact but jittery, smooth closes a frame-rate independent share of the gap with 1 - exp(-k * dt), the deadzone ignores small moves, and look-ahead shows more of what is coming. After every follow step the camera is clamped to the level, or centers a level smaller than the view, and zoom keeps the center point fixed while the world is drawn once and scaled once.
🎓 Key Takeaways
screen = (world - camera.pos) * zoomandworld = screen / zoom + camera.posare exact inverses.- Smooth following uses
blend = 1 - math.exp(-sharpness * dt): no overshoot, same feel at any frame rate. - A deadzone moves the camera only by how far the player pushed past its edge.
- Look-ahead shifts the goal by an eased lead distance in the facing direction.
- Clamp after following, every frame, using the zoomed
view_size; center levels smaller than the view. - Zoom about the center, and apply the zoom in exactly one place when drawing.
🔭 Looking Ahead
You now have tile levels and a camera to explore them. Next, Character Controllers makes the player feel great to control, with coyote time, jump buffering and animation driven by the player's state.
❓ Common Questions
The world shimmers or tiles show thin gaps when the camera moves slowly. Why?
The camera position is a float, so every tile and sprite lands at a fraction of a pixel, and a different fraction every frame. pygame-ce draws at whole pixels by dropping the fraction (toward zero), so a tile partly off the left edge at x = -0.6 is drawn at 0 while its neighbor at 31.4 is drawn at 31, one pixel too close, and things positioned separately (the player, the coins) can snap a pixel apart from frame to frame. Scaling a zoomed view magnifies those one-pixel slips. A common fix is to round the camera position once, before drawing (cam_x = round(camera.pos.x)), and use that for everything drawn that frame, while the float keeps smoothing.
Should the camera update before or after the player moves?
After. Move the player, resolve collisions, then let the camera follow the player's final position for this frame. If the camera goes first, it always aims at where the player was, one frame behind.
Can I combine modes, say a deadzone with smoothing?
Yes, and many games do. For example, compute the deadzone's goal position without moving the camera, then smooth toward that goal. Keep each piece small and testable; the exercise's follow() method is a good place to experiment.
Is it expensive to scale the whole view every frame when zoomed?
It is one extra full-screen operation per frame. For a 640 × 480 window that is usually fine, but don't assume it: if your game slows down when zoomed, measure it. At zoom 1 the lab skips the scale and blits the view directly.
Where does screen shake fit in?
Shake is a small, temporary offset added to the camera position when drawing, after clamping, and never stored back into pos, so it can't push the camera off its path. The Going Further section points to the lesson that builds it properly.
Why is dt capped at 0.05 instead of using a fixed timestep?
Same choice as in Tile Maps: a variable step capped at 0.05 s keeps the camera code short and stops a long frame from teleporting the player. The camera itself doesn't care which loop you use, because it follows wherever the player ends up. If you move the player into the fixed-timestep accumulator from Velocity & Timesteps, update the camera once per frame after the physics loop, not once per physics step.
🎯 Quick Quiz
Question 1: A smooth camera has sharpness = 6 and this frame's dt is 1/60. About what share of the remaining gap does it close this frame?
Question 2: Why does the smooth camera use 1 - math.exp(-sharpness * dt) instead of sharpness * dt?
Question 3: The deadzone is 160 × 120 px. The player is 50 px to the right of the camera's center and level with it. What does the camera do this frame?
Question 4: The camera is at pos = (100, 50) with zoom = 2. Where does world_to_screen((130, 60)) put that point?
Question 5: A one-room level is 400 px wide and the view is 640 px wide. What does clamp() set pos.x to?
🌟 Going Further
- Deadzone plus smoothing: make a fifth mode that computes the deadzone's goal and then smooths toward it. Is it better or worse than either alone?
- Camera rooms: split the level into rectangles ("rooms") and clamp the camera to whichever room the player is in, easing between rooms when they cross over.
- Split screen: give two players a camera each, and draw the world twice, into the left and right halves of the window, with
screen.subsurface. - Mouse zoom: zoom with the mouse wheel about the point under the cursor instead of the center: remember
screen_to_world(mouse)before zooming and move the camera so it is under the cursor again after. - Read the docs: pygame-ce's Vector2 and pygame.transform (scale and smoothscale).
- Coming up in Game Dev II: Intermediate: Parallax Scrolling draws background layers that move slower than the camera, and Screen Shake, Tweens & Juice adds camera shake that never breaks the clamping.